
Windows 10, like earlier versions of Windows, supports creating multiple user accounts. You can either create local user accounts as well Microsoft accounts to sign in to Windows 10.
Many of us have created more than one user accounts to let others also use our PCs. For instance, you might have created another user account to let your family use your PC.

If you have more than one user accounts on your PC, at times, you might want to disable or block a user account on your PC to restrict a user from accessing his/her account or stop a user from using your PC.
While you can always delete a user account to remove that account permanently, you might want to block or disable an account for a short period. For instance, you might want to block or disable your kid’s user account during exams to stop playing games on PC.
Windows 10 has a provision to disable or block user accounts. You can either block a Microsoft account or a local user account. You must be the administrator to block or disable a user account.
When the user tries to sign-in to a blocked account, he will get “Your account has been disabled. Please see your system administrator” message if it’s a local user account. If it’s a Microsoft account, the user will get wrong password error even if he/she is entering the correct password.
Follow the step-by-step directions given below to block or disable a user account in Windows 10.
Method 1 of 2
Enable or disable a user account in Windows 10 Pro
Note: This method applies to Windows 10 Pro and above editions only. If you are on Home edition, please refer to the directions in Method 2.
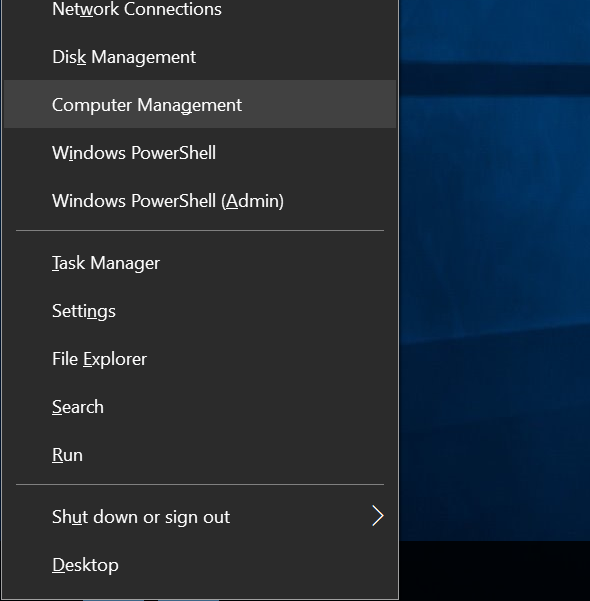
Step 1: Right-click on the Start button on the taskbar and then click Computer Management to open the same.
Step 2: On the left-pane of Computer Management, expand Local Users and Groups folder. Now click Users folder.
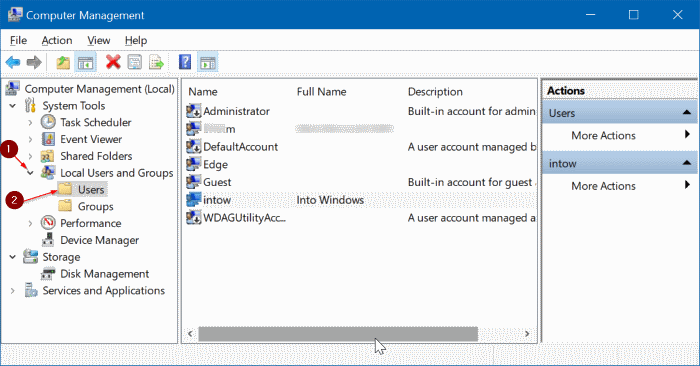
Step 3: Now, on the right-side, you will see all local and Microsoft accounts on your PC.
Step 4: Right-click on the user account that you want to block or disable, and then click Properties.
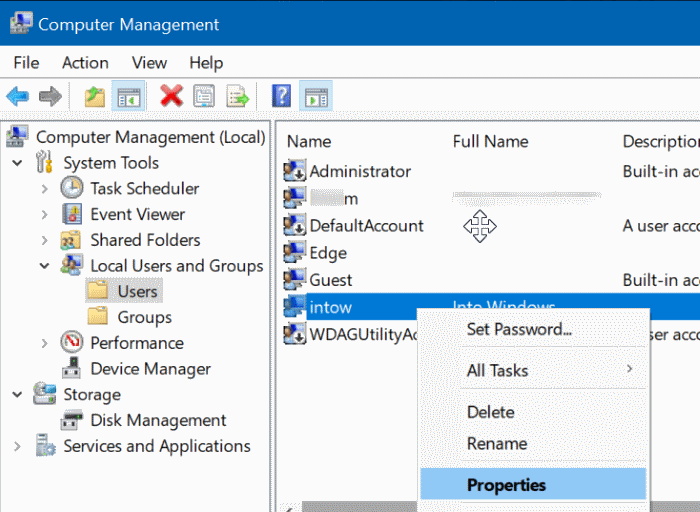
Remember that you cannot disable or block the user account that you are currently logged-in. Also, you must have admin rights to disable or block a user account.
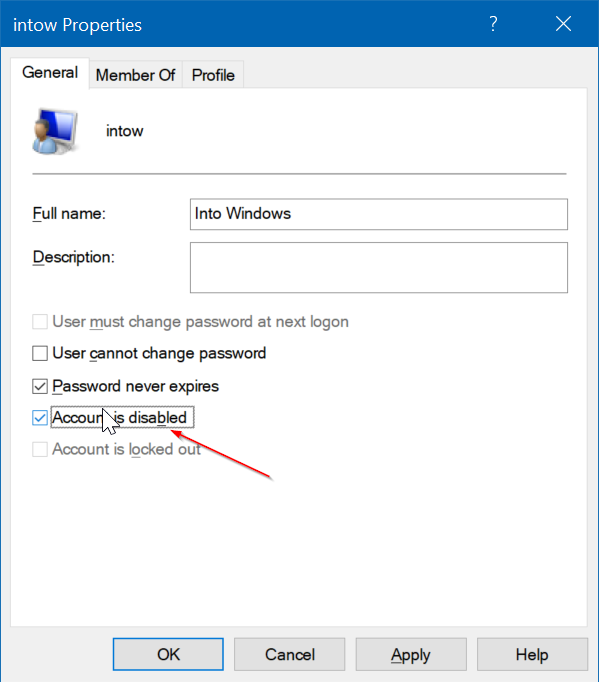
Step 5: In the Properties dialog, under the General tab, check Account is disabled option. Finally, click Apply button to disable or block the account.
To enable a blocked or disabled user account in Windows 10
Follow the directions mentioned in the above guide and then uncheck the Account is disabled option. Click Apply button. That’s it!
Method 2 of 2
Enable or disable user account in Windows 10 Home
Windows 10 Home users can use Command Prompt to enable or disable a user account.
Step 1: Open Command Prompt as administrator.
Step 2: In the elevated Command Prompt, execute the following command to enable or disable a user account.
net user accountname /active:no
In the above command replace “accountname” with the actual name of the user account.

To enable the user account, use the following command:
net user accountname /active:yes
Again, replace “accountname” with the user account name.
No comments:
Post a Comment