Search This Blog

Thursday, September 2, 2021

Laptop Motherboard Programmable I/0 Chips

 => List of ENE I/O Microcontroller Chip: –

– ENE kb9012

– ENE kb9012

– ENE kb9016

– ENE kb9018

– ENE kb9022

– ENE kb9028qc

– ENE kb9010

– ENE kb3930qf/b1


=> List Of ITE I/O Microcontroller Chip: –

– ITE it8585e

– ITE it8586e

– ITE it8985e

– ITE it8587e

– ITE it8522

– ITE it8987e

– ITE it8589

– ITE it8522

– ITE it8380E 192kb

– ITE it8380VG 192kb

– ITE it8995E-128

– ITE it8886H

– ITE it8886he

– ITE it8386


=> List Of Nuvoton I/O Microcontroller Chip: –

– Nuvoton npce288na0dx

– Nuvoton npce388na0dx


=> List Of SMSC I/O Microcontroller Chip: –

– SMSC MEC 1609

Faults That Occur In ME Region Problem:

 These are the faults and signs that occur in ME Region problem.


1- When you turn on the laptop at first attempt, the laptop will turn on but the display will not come. At the same time turn your laptop off by pressing the power button. Try the second attempt and turn your laptop on, it will show the display now.


2- In the second situation, you will try several attempts to turn your laptop on, but it will not show any display. In the meantime, it shows out the display at your any try and your laptop along with Windows starts running perfectly. But, when you shut it down and starts again, it creates the same problem of not showing the display.


3- Some time fan run at full speed and PCH heats up, whether the display come or not but your laptop turn of within 15 sec to 5 min.


4- When you press the power button, the display comes after 20-60 seconds.


5- In some cases, CPU temperature is always set at 100%.


6- One of the faults is that laptop runs for 30 seconds, 30 minute or 1 hour and sometimes automatically shut down or restart.


7- Sometimes there is Windows OS loading problem.

how to fix Bios ME Region Problem

 Step 1: Download intel me/txe injector.

Step 2: Then, download the database (Intel ME firmware).

Step 3: Run intel me/txe injector, it will ask first time to locate a folder where you save (intel me firmware). After you locate the folder, it will take 2 to 15 sec to load (intel me firmware) then it will show the menu.

Step 4: Just click (open bios) and select your desired bios.

Step 5: Click on (save new bios) button, the software will clean ME Region Bios.


That’s it, your problem has been resolved. Now, just reprogram your clean ME Bios Bin

How To Clean ME Region Bios?

 Now, you can clean ME Region Bios as simple as ABC. Just follow the steps told in the video for better understanding. You can also follow the written steps of how to fix Bios ME region given under the video.


Note: It is to be noted that, if your laptop motherboard has 2 Bios EEPROM Ic i.e, EC and Main, then you will put the main bios file in this software. The ME Region firmware is stored in the main bios file.

Wednesday, September 1, 2021

What Is The ME Region Problem?

(Management Engine Region) 

One of the major cause of the ME Region problem is that you take the bios from the other laptop and write it on your EEPROM Ic. Or you download the bios from the specific website or somewhere else and programme it to your motherboard. It is because the information of your motherboard’s PCH doesn’t match to the bios that you’ve installed.

How To Use Dc Power Supply For Dell Laptops

 I will teach you how to make dell charger. All you have to need is DS2501 (EPROM) ic.This ic has three legs, two of them are in use and the third one is spare. First leg of the ic is called ground, second is known as data and the third leg is spare which is not connected to anything; as I had shown you in this picture. I use the wire that is mentioned in the first picture for my dc power supply in laptop checking. You can convert the chargers of Toshiba, Acer or Asus into Dell by making this cable that is connected to ic. And you can also use this ic in repairing of the Dell charger. When you will check the bios of Dell laptop , there will be mention that 90 watt charger is connected. Each laptop has different range of wattage. For example, Dell alienware laptop is of 220 watt and mostly laptops which are coming now a days are of 90 watt. The ic DS2501 which we are giving is of 90 watt.


How To Identify N-channel And P-channel MOSFET

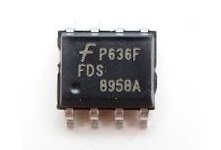
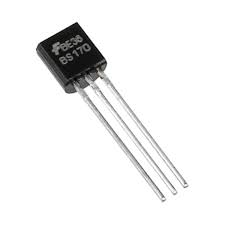
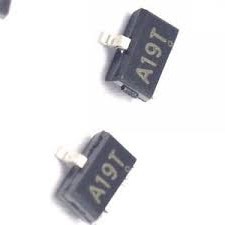
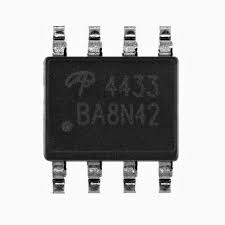
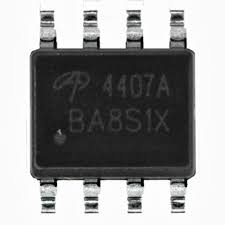
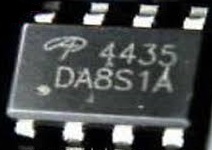
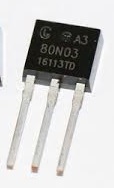
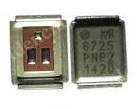
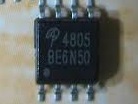
Finding the difference between n-channel and P -channel MOSFET can be tricky. But, I will tell you how to know N-channel and P-channel MOSFET easily. The easy method to recognize that which is that particular MOSFET is by marking code given on it. The ending of the marking code tells us that whether the MOSFET is N-channel or P-channel.

Main Difference Between N-channel MOSFET And P-channel MOSFET:

The significant difference between the two MOSFET is:
N-channel MOSFET ends with even number, i-e, 0, 2, 4, 6, 8
P-channel MOSFET ends with an odd number, i-e, 1, 3, 5, 7, 9


Examples For N-channel MOSFET And P-channel MOSFET:


N-channel Mosfet:
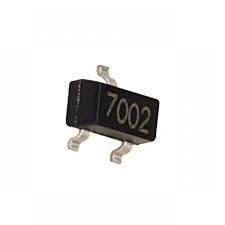
This N-channel MOSFET ends with 2, which is even number.
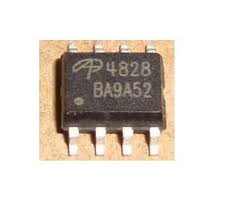
This N-channel MOSFET ends with 8, which is even number.

This N-channel MOSFET ends with 0, which is even number.
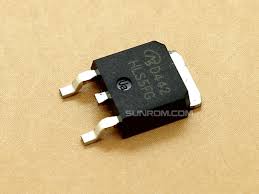
This N-channel MOSFET ends with 2, which is even number.

This N-channel MOSFET ends with 4, which is even number.
This N-channel MOSFET ends with 6, which is even number.


P-channel Mosfet:
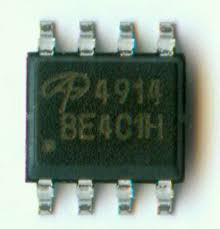
This P-channel MOSFET ends with 9, which is odd number.
This P-channel MOSFET ends with 3, which is odd number.

This P-channel MOSFET ends with 7, which is odd number.
This P-channel MOSFET ends with 5, which is odd number.
This P-channel MOSFET ends with 3, which is odd number.
This P-channel MOSFET ends with 5, which is odd number.
This P-channel MOSFET ends with 9, which is odd number

How to use equvalent I/O chip on the laptop motherboard


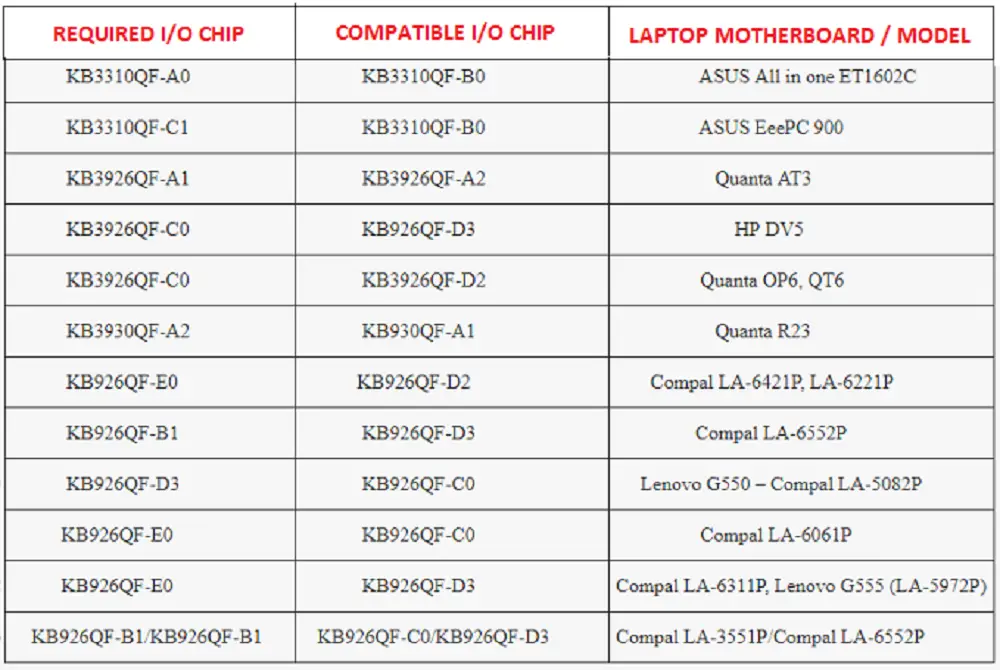
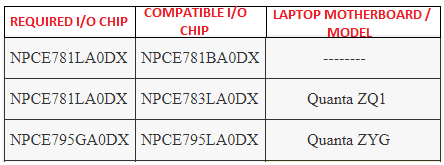
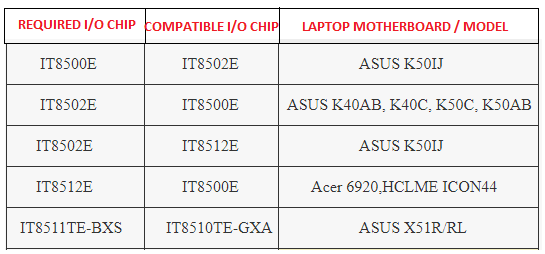
The specific I/O chips are used on every laptop motherboard. Sometimes, it is difficult to find that specific I/O chip when the first one got damaged. In this how-to session, you will know how to use altered I/O chip on a particular laptop motherboard. In below, I have given the various range compatible super I/O controllers with their specific laptop motherboards. In the future, we will keep updating the range of compatible I/O controllers.
– ENE:-

Here are various ENE I/O chips. I have given the name of other compatible along with them. You can use them in the particular laptop model given with them. Have a look


– WINBOND: –

The list of Winbond super I/O chips is in the following:-


– Nuvoton: –

Here is the table of Nuvoton compatible I/O chips with their respected laptop motherboards.


– ITE: –

The compatible ITE I/O chips are as follows.


– SMSC: –

Take a look at the table of compatible SMSC I/O chips.

How To Program Laptop KB9012 I/O Chip


How To Program Laptop KB9012 I/O Chip


How To Program Laptop KB9012 I/O Chip. In this article, I am going to introduce you with the procedure that how to program laptop KB9012 I/O chip. As, you know that, oftenly there are two bios in the laptop’s motherboard. One is the main bios and the other is CE bios. Main bios is of more Mb’s than CE bios.


In the latest laptops, the processor is integrated within the motherboard and has only the main bios chip. These laptops contain the KB9012 programmable I/O chip. This I/O chip contain all the features of a CE bios ic. All laptops with KB9012 or like the same programmable I/O chip has the CE bios file store within it. In this method you will come to know, how to program laptop KB9012 I/O chip and other programmable I/O chips. The method is same as for all programmable I/O chips as explained in the following.


Mostly Dell laptops gives the 7 beeps and in some of them, there is the problem of I/O CE bios. The I/O CE bios is corrupt due to which it gives the beeps or do not show the display.


Now, if you have to programme the I/O chip, the connections of the I/O chip can be find in the keyboard connector. In the above featured image, there are ksI7, ksI4, ksI5, ksI6 and ks03 connections of the I/O chip. I have found these connections from the laptop motherboard diagram. This is 30 pin keyboard connector. I can’t tell you like this that which wire will be attached to which connector. Because, every laptop differs in it. The pin outs ksI7, ksI4, ksI5, ksI6 and ks03 are different for every laptop’s keyboard connector. You have to do it yourself by reviewing the particular laptop’s motherboard diagram. That, which connector needs these pin outs. I have told in the pictures; where the particular wire will be connect with RT809F programmer.


There are several motherboards which need 3.3 volts to programme the I/O chip. Connect the wire as shown in the picture that at any area where there is always 3.3 voltage. Plug in the charger for giving power to the motherboard but, kept in the mind not to power on the motherboard.