How to optimize Windows 10 for gaming & performance
Method 1. Increase Windows 10 performance with Updated Drivers
There are many automated tools such as Driver Easy we use for automatically updating system drivers. Use the Driver Easy for updating all other drivers.
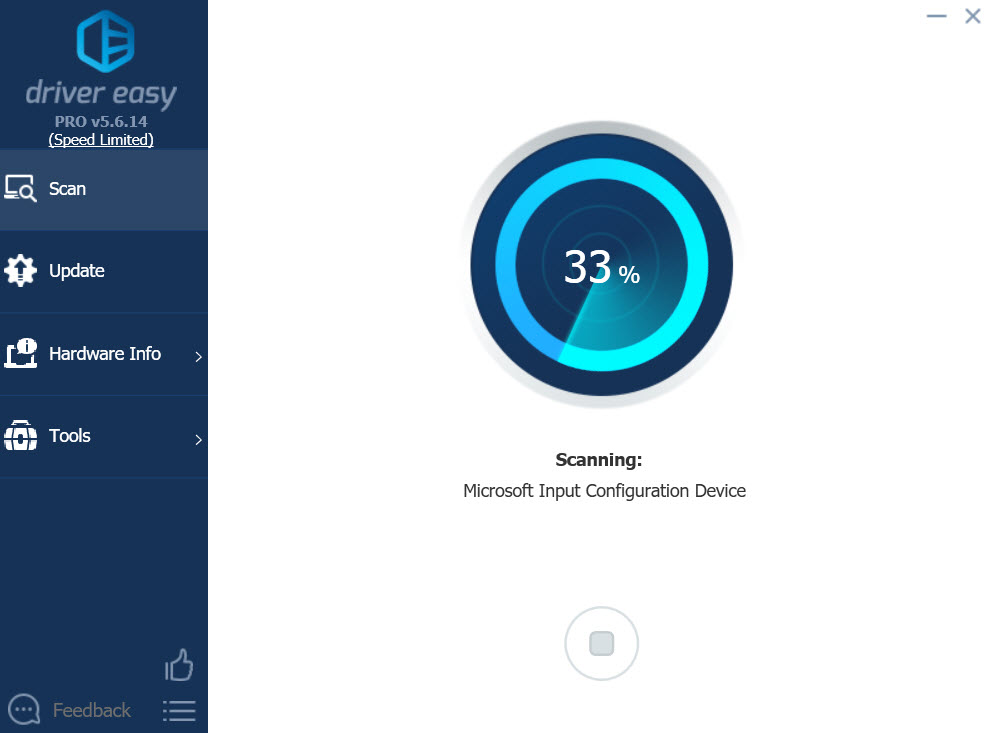
Download Driver Easy for Windows 10
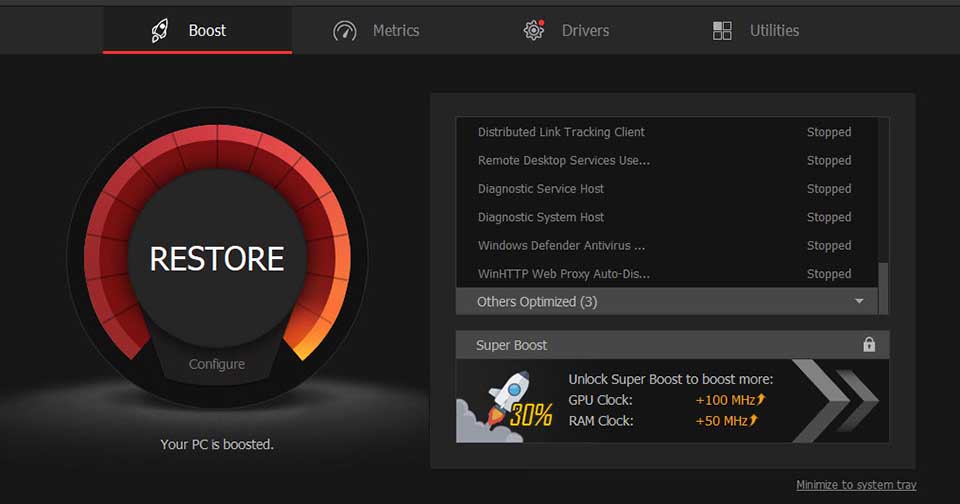
Method 2. Use Game Booster and Boost Mode
Apps such as Razer Cortex, Game Booster, and more. Have a boost mode which can help improve gaming performance and get the best out of your system. These apps will offer you the resources you require and close all the unnecessary windows services for optimizing Windows 10 while gaming.
Method 3. Increase virtual memory
Increasing Virtual Memory to twice the ram you have, this will help you get plenty of memory during playing games on your Windows PC or Laptop. When the system runs out of ram, this memory is used, thus the more you have, the better.
To adjust the virtual memory size on Windows 10, follow these steps:
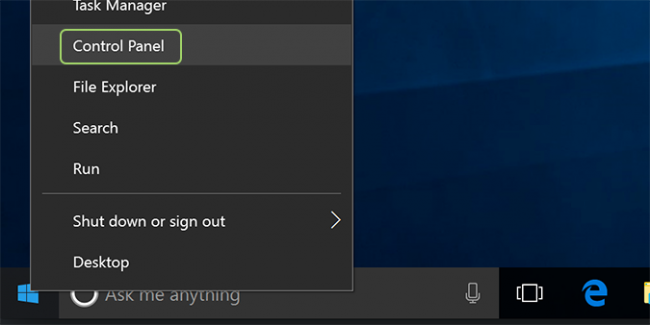
1. Click on the Start Menu and select Settings.
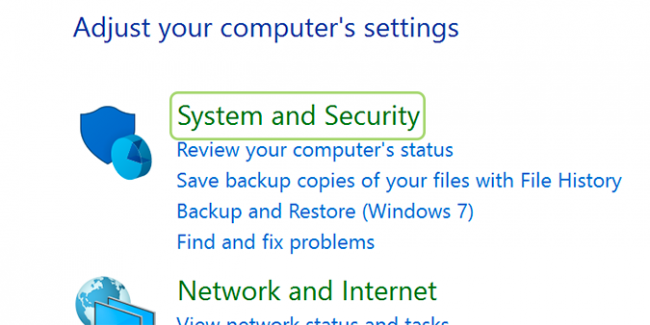
2. Type performance, select Adjust the appearance and performance of Windows.
3. In the new window, switch to the Advanced tab, click on Change… under the Virtual memory section.
4. In the Virtual memory window, uncheck the Automatically manage paging file size for all drives box at the top of the same windows and then click on Custom size. Set it as double your actual ram.
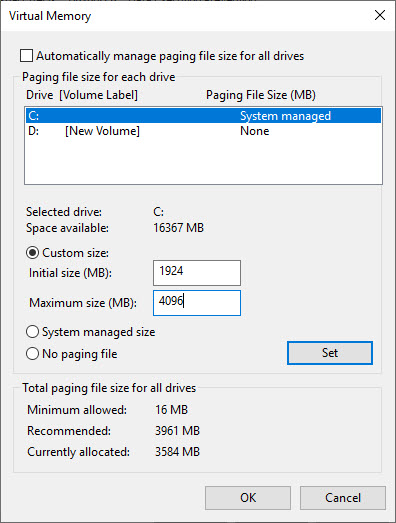
5. Click OK to save settings.
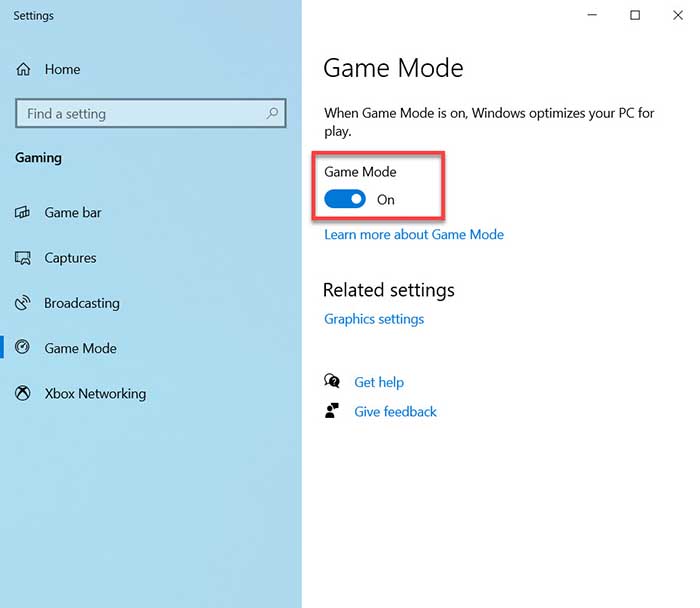
Method 4. Optimize Windows 10 With Gaming Mode
Later releases of the Windows 10 operating system feature a gaming mode, built-in optimizations for gaming. To find out more, type Game Mode in the search bar then click the option that comes up and switch it to On. With Game Mode, Windows 10 ensures you play your games with the best possible experience.
Method 5. Disable Nagle’s Algorithm
Essentially, Nagle’s algorithm bundles data packets at the cost of a smoother internet connection. Having Nagle’s algorithm enabled on your computer causes latency issues while playing games online.
To disable this and increase gaming performance on Windows 10, follow these steps:
1. Windows Registry: Start > type regedit > Regedit.
2. Go to the following path:
HKEY_LOCAL_MACHINE\SYSTEM\CurrentControlSet\Services\Tcpip\Parameters\Interfaces
3. In the left-hand pane, you’ll get to a collection of folders, with filenames comprised of numbers and letters. In order to access the correct file, match your IP address with the listed DhcpIPAddress or IPAddress in one of these files as shown in the image below:
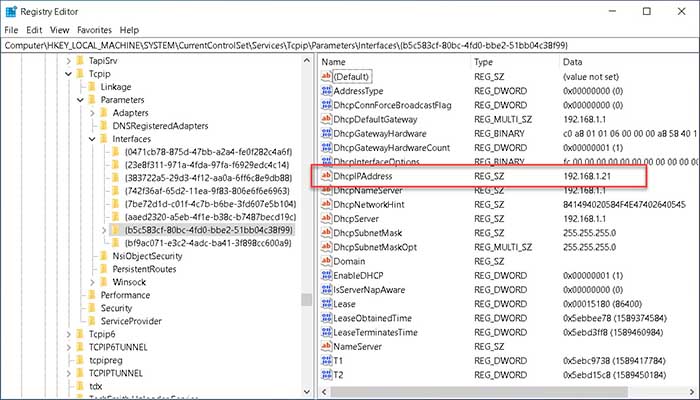
You can check your IP address by opening Command Prompt as Administrator and then entering ipconfig.
Find the “IPv4 address” listed under your current connection (typically Wireless LAN or Ethernet).
Once you’ve tracked down the IP address of your internet connection, create two DWORD Values: name one TCPNoDelay and the other TcpAckFrequency. Once you’ve created the values, double-click on each and set their parameters to 1. After that, double-click on each and set their parameters to 1.
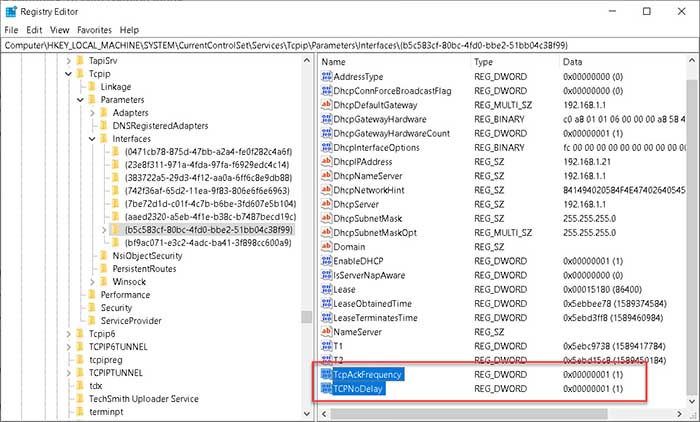
This activates the two parameters, thereby disabling Nagle’s Algorithm. If you run into any issues, set their parameter value back to 0 and they will be disabled.
Method 6. Max Power Plan to Improve Windows 10 Gaming
Depending on the power plan you have chosen, power management can be a miss or hit in Windows 10. This option is quite useful for gaming laptop users who might want to save on battery life. However, Desktop users don’t need to worry about this restriction, we can put the system in the High-performance Mode.
Here are the steps to change your power settings via the Settings screen:
1. Click on the Start menu and type in power plan in the search bar.
2. Click “Choose a power plan” and choose “Show additional plans”.
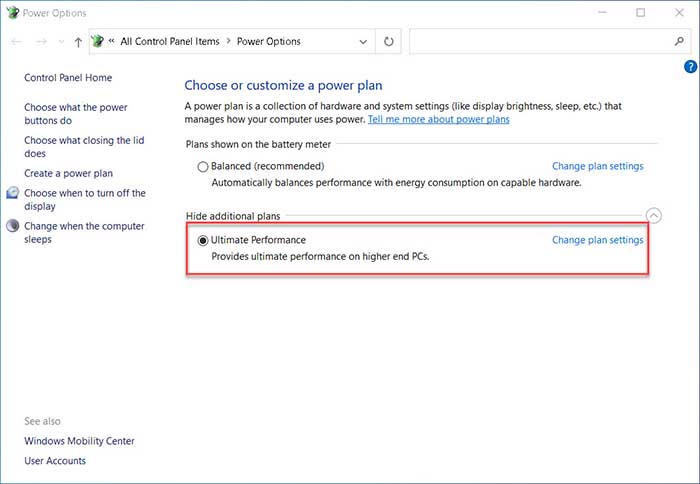
3. Moving on, just select the power plan to Ultimate Performance Mode. If you do not see Ultimate Performance Mode, start a command prompt “cmd.exe” as Administrator
In the command prompt, copy & paste the below command and press Enter:
powercfg -duplicatescheme e9a42b02-d5df-448d-aa00-03f14749eb61
This is another tip that can help people with low end PC/laptops to tweak Windows 10 for gaming and even productivity.
Note: laptop users your battery will drain faster.
Method 7. Disable system visual effects
When you turn visual effects off, then the graphics and appearance will look a little crappy, but the performance will get a considerable boost. We highly recommend doing this before starting the high-end games on low-end PCs.
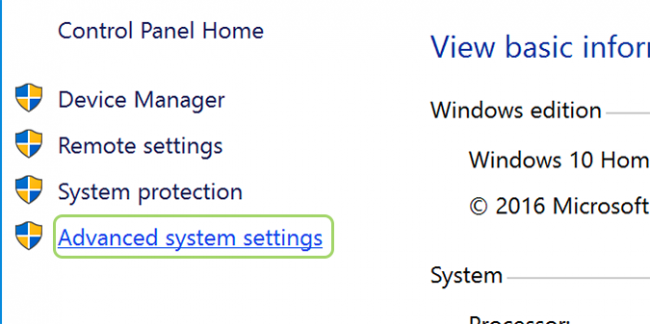
1. Click on Start menu, and type in advanced system settings in the search bar.
2. Select “View advanced system settings”.
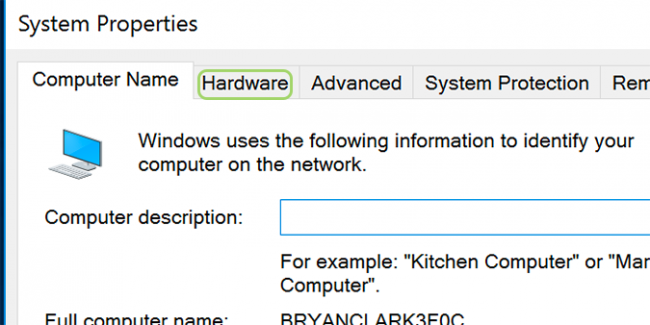
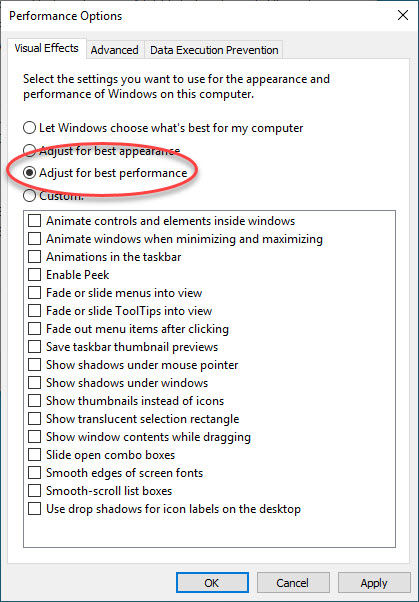
3. Switch to the Advanced tab, click on the Settings option under the Performance section.
4. Select the option called Adjust for best performance.
Method 8. Turn off unnecessary services and widgets
Open Windows 10 Settings and disable unnecessary services and widgets.
Turn off unnecessary features of windows that you don’t use such as Cortana maps location and other background services. There are many apps like IObit uninstaller or CCleaner, which can help you remove stock Windows apps.

you can uninstall apps such as phone apps, maps, etc. to get some extra space and performance for your system.
Method 9. Use cleaning apps to optimize Windows 10
Use IObit Advanced SystemCare, CCleaner, Glary Utilities, etc to fully delete all temporary junk files and clean your C drive for max performance. Remove all the bloatware from your system.
Method 10. Disable mouse acceleration
Windows 10 has a feature called mouse acceleration which adds some lag while playing FPS games. If you play many FPS shooter games such as Call Duty of Mobile, PUBG, Area F2 then you might want to turn off this feature to make more accurate mouse movements.
1. Click on Start menu, and type in pointer in the search bar.
2. Select Change the mouse pointer display or speed.
3. Untick Enhanced pointer precision.
Method 11. Run Defragmentation tool to boost performance
Well, it is not a common solution to optimizing your Windows, though it is quite easy to follow. If you’ve had your Windows 10 installed for a while now, and not defragmented your hard drive regularly, then this might help to improve the performance. Here are the steps to defragment drives:
1. Click on the Start menu and type in Defragment in the search bar.
2. Select Defragment and Optimize Drives from the results and open it.
3. Now, choose the Windows drive of your system. (In my example, the C: drive). Click Optimize.
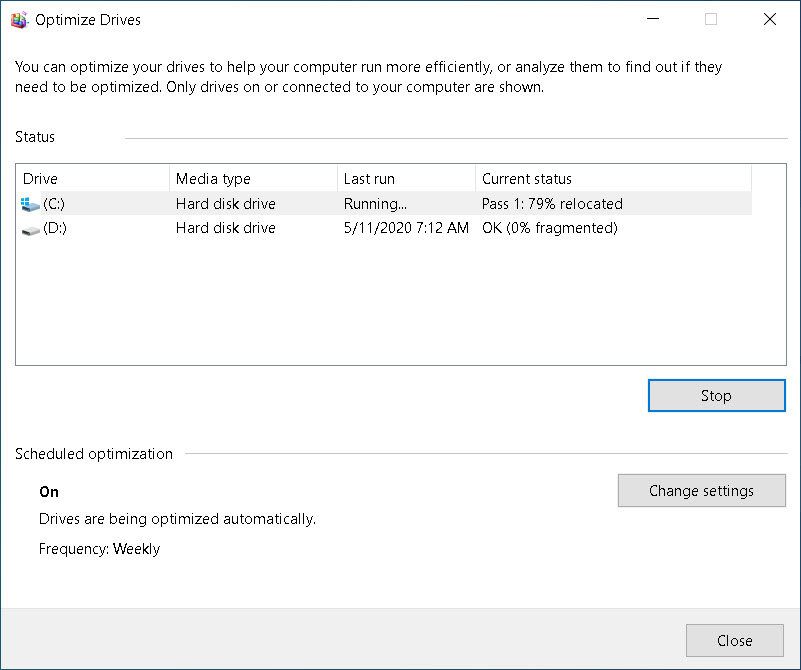
Wait until the process completed, it may take some time.
Method 12. Install DirectX 12 and make your PC faster
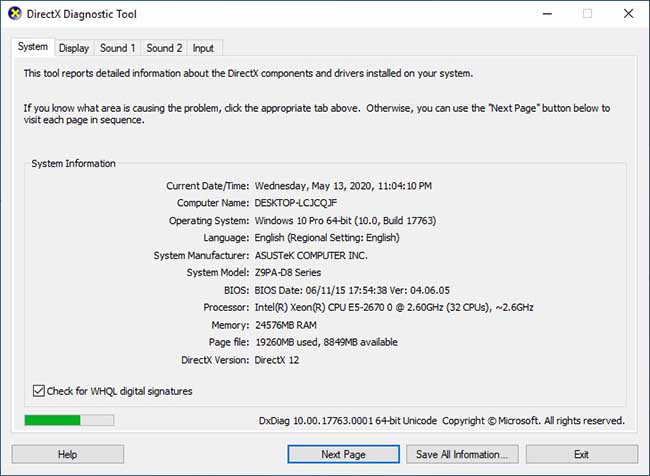
Installing DirectX 12 (the latest version of Microsoft’s popular API tool) can significantly boost your PC/laptop gaming performance. These are key elements required for game optimization. It offers support for multiple GPU and CPU cores, lowered power consumption, better frame-rates, and enhanced graphical effects. By making sure your PC or laptop is having the latest version of DirectX 12, your PC or laptop faster for gaming.
Method 13. Prevent Steam From Auto-Updating Games
If you use Windows to play games, you’re probably buying and installing games via Steam.
One of the most resource-consuming features is the steam update features, which will not enable you to prevent automatic updates across all your games. This may eat up memory by limiting your network connectivity with background updates or updating games you don’t play.
To prevent Steam from updating games in the background, navigate to your Steam client and set your update options under Steam > Settings > Downloads.
Untick Allow downloads during gameplay to prevent Steam from updating content while you’re gaming.
To prevent Steam from downloading updates for largely-unused games right-click on each of the installed games in your Library in question and click Properties.
Under Automatic Updates, change Always keep this game up to date to Only update this game when I launch it.
Method 14. Install Windows on A SSD to optimize windows
We know you are probably thinking that upgrading and installing a Solid State Drive (SSD) won’t have a major impact on games, in terms of performance at least. Yes, you are correct but this method isn’t just exclusive to making games run faster.
SSDs are really faster than your traditional hard drive. With SSD, you will see much faster load times in games, and Windows boots up quicker too.
Method 15. Reset Windows
If your PC or Laptop is running slow to the point that it cannot bear anymore, we suggest you reset Windows for a fresh start. Reset the system and keep your personal files and do the following optimization again.
Method 1. Increase Windows 10 performance with Updated Drivers
There are many automated tools such as Driver Easy we use for automatically updating system drivers. Use the Driver Easy for updating all other drivers.
Download Driver Easy for Windows 10
Method 2. Use Game Booster and Boost Mode
Apps such as Razer Cortex, Game Booster, and more. Have a boost mode which can help improve gaming performance and get the best out of your system. These apps will offer you the resources you require and close all the unnecessary windows services for optimizing Windows 10 while gaming.
Method 3. Increase virtual memory
Increasing Virtual Memory to twice the ram you have, this will help you get plenty of memory during playing games on your Windows PC or Laptop. When the system runs out of ram, this memory is used, thus the more you have, the better.
To adjust the virtual memory size on Windows 10, follow these steps:
1. Click on the Start Menu and select Settings.
2. Type performance, select Adjust the appearance and performance of Windows.
3. In the new window, switch to the Advanced tab, click on Change… under the Virtual memory section.
4. In the Virtual memory window, uncheck the Automatically manage paging file size for all drives box at the top of the same windows and then click on Custom size. Set it as double your actual ram.
5. Click OK to save settings.
Method 4. Optimize Windows 10 With Gaming Mode
Later releases of the Windows 10 operating system feature a gaming mode, built-in optimizations for gaming. To find out more, type Game Mode in the search bar then click the option that comes up and switch it to On. With Game Mode, Windows 10 ensures you play your games with the best possible experience.
Method 5. Disable Nagle’s Algorithm
Essentially, Nagle’s algorithm bundles data packets at the cost of a smoother internet connection. Having Nagle’s algorithm enabled on your computer causes latency issues while playing games online.
To disable this and increase gaming performance on Windows 10, follow these steps:
1. Windows Registry: Start > type regedit > Regedit.
2. Go to the following path:
HKEY_LOCAL_MACHINE\SYSTEM\CurrentControlSet\Services\Tcpip\Parameters\Interfaces
3. In the left-hand pane, you’ll get to a collection of folders, with filenames comprised of numbers and letters. In order to access the correct file, match your IP address with the listed DhcpIPAddress or IPAddress in one of these files as shown in the image below:
You can check your IP address by opening Command Prompt as Administrator and then entering ipconfig.
Find the “IPv4 address” listed under your current connection (typically Wireless LAN or Ethernet).
Once you’ve tracked down the IP address of your internet connection, create two DWORD Values: name one TCPNoDelay and the other TcpAckFrequency. Once you’ve created the values, double-click on each and set their parameters to 1. After that, double-click on each and set their parameters to 1.
This activates the two parameters, thereby disabling Nagle’s Algorithm. If you run into any issues, set their parameter value back to 0 and they will be disabled.
Method 6. Max Power Plan to Improve Windows 10 Gaming
Depending on the power plan you have chosen, power management can be a miss or hit in Windows 10. This option is quite useful for gaming laptop users who might want to save on battery life. However, Desktop users don’t need to worry about this restriction, we can put the system in the High-performance Mode.
Here are the steps to change your power settings via the Settings screen:
1. Click on the Start menu and type in power plan in the search bar.
2. Click “Choose a power plan” and choose “Show additional plans”.
3. Moving on, just select the power plan to Ultimate Performance Mode. If you do not see Ultimate Performance Mode, start a command prompt “cmd.exe” as Administrator
In the command prompt, copy & paste the below command and press Enter:
powercfg -duplicatescheme e9a42b02-d5df-448d-aa00-03f14749eb61
This is another tip that can help people with low end PC/laptops to tweak Windows 10 for gaming and even productivity.
Note: laptop users your battery will drain faster.
Method 7. Disable system visual effects
When you turn visual effects off, then the graphics and appearance will look a little crappy, but the performance will get a considerable boost. We highly recommend doing this before starting the high-end games on low-end PCs.
1. Click on Start menu, and type in advanced system settings in the search bar.
2. Select “View advanced system settings”.
3. Switch to the Advanced tab, click on the Settings option under the Performance section.
4. Select the option called Adjust for best performance.
Method 8. Turn off unnecessary services and widgets
Open Windows 10 Settings and disable unnecessary services and widgets.
Turn off unnecessary features of windows that you don’t use such as Cortana maps location and other background services. There are many apps like IObit uninstaller or CCleaner, which can help you remove stock Windows apps.
you can uninstall apps such as phone apps, maps, etc. to get some extra space and performance for your system.
Method 9. Use cleaning apps to optimize Windows 10
Use IObit Advanced SystemCare, CCleaner, Glary Utilities, etc to fully delete all temporary junk files and clean your C drive for max performance. Remove all the bloatware from your system.
Method 10. Disable mouse acceleration
Windows 10 has a feature called mouse acceleration which adds some lag while playing FPS games. If you play many FPS shooter games such as Call Duty of Mobile, PUBG, Area F2 then you might want to turn off this feature to make more accurate mouse movements.
1. Click on Start menu, and type in pointer in the search bar.
2. Select Change the mouse pointer display or speed.
3. Untick Enhanced pointer precision.
Method 11. Run Defragmentation tool to boost performance
Well, it is not a common solution to optimizing your Windows, though it is quite easy to follow. If you’ve had your Windows 10 installed for a while now, and not defragmented your hard drive regularly, then this might help to improve the performance. Here are the steps to defragment drives:
1. Click on the Start menu and type in Defragment in the search bar.
2. Select Defragment and Optimize Drives from the results and open it.
3. Now, choose the Windows drive of your system. (In my example, the C: drive). Click Optimize.
Wait until the process completed, it may take some time.
Method 12. Install DirectX 12 and make your PC faster
Installing DirectX 12 (the latest version of Microsoft’s popular API tool) can significantly boost your PC/laptop gaming performance. These are key elements required for game optimization. It offers support for multiple GPU and CPU cores, lowered power consumption, better frame-rates, and enhanced graphical effects. By making sure your PC or laptop is having the latest version of DirectX 12, your PC or laptop faster for gaming.
Method 13. Prevent Steam From Auto-Updating Games
If you use Windows to play games, you’re probably buying and installing games via Steam.
One of the most resource-consuming features is the steam update features, which will not enable you to prevent automatic updates across all your games. This may eat up memory by limiting your network connectivity with background updates or updating games you don’t play.
To prevent Steam from updating games in the background, navigate to your Steam client and set your update options under Steam > Settings > Downloads.
Untick Allow downloads during gameplay to prevent Steam from updating content while you’re gaming.
To prevent Steam from downloading updates for largely-unused games right-click on each of the installed games in your Library in question and click Properties.
Under Automatic Updates, change Always keep this game up to date to Only update this game when I launch it.
Method 14. Install Windows on A SSD to optimize windows
We know you are probably thinking that upgrading and installing a Solid State Drive (SSD) won’t have a major impact on games, in terms of performance at least. Yes, you are correct but this method isn’t just exclusive to making games run faster.
SSDs are really faster than your traditional hard drive. With SSD, you will see much faster load times in games, and Windows boots up quicker too.
Method 15. Reset Windows
If your PC or Laptop is running slow to the point that it cannot bear anymore, we suggest you reset Windows for a fresh start. Reset the system and keep your personal files and do the following optimization again.