Enable or disable Reserved Storage in Windows 10
Starting with Windows 10 version 1903, there is a new feature called Reserved Storage. As the name suggests, Reserved Storage is nothing but a certain amount of disk space set aside by Windows 10 for Windows Updates, apps, temporary files, and system caches.
The idea behind Reserved Storage is to always have some disk space for Windows Update, temporary files, system caches, and apps. As you likely know, Windows operating system and other apps might not work as expected when the disk is full. By enabling the reserved storage, you can make sure that Windows 10 will always
The amount of storage reserved starts at about 7 GB and the same varies over time based on how you use your Windows 10 computer. As you can see in the picture below, on my PC, reserved storage is using just 2.5 GB of disk space.
Step 1: Open the Registry Editor by keying in Regedit in Start/taskbar search field and then hitting the Enter key.
Step 2: Navigate to the following registry key:
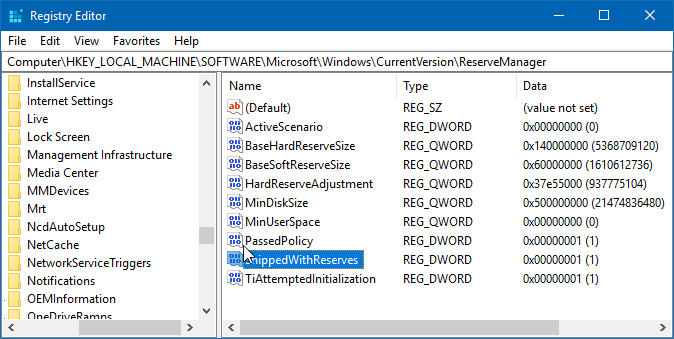
HKEY_LOCAL_MACHINE\SOFTWARE\Microsoft\Windows\CurrentVersion\ReserveManager
TIP: Simply copy and paste the above registry path in the Registry Editor’s address bar and then press the Enter key to quickly navigate to the key.
Step 3: On the right-side, look for ShippedWithReserves and double-click on it to open its properties.

Step 4: Set the value data to 0 to disable the Reserved Storage. Setting the value data to 1 will enable the Reserved Storage in Windows 10.
