Search This Blog

Tuesday, May 21, 2024

HP TPN-C125, shut down automatically from time to time for maintenance!

HP TPN-C125, shut down automatically from time to time for maintenance!


I received a HP computer from my colleague, saying that it always shuts down automatically. He took it apart, cleaned the dust and replaced the silicone grease, but it still failed. The baking machine tested that the CPU and graphics card were normal and would not shut down automatically, but it turned off itself after working normally or standing there for a while.

Get the machine and bake it for a few hours. Test that everything is normal and it will not automatically cut off power. First of all, I wonder if it has something to do with sleep. If I turn off the sleep standby test, it will still automatically cut off the power. I wonder if the memory is unstable, then open the memory test tool and test it is normal; Because there is data on the hard disk, I am afraid to break the system, and I am going to test it in WIN10 PE. I just entered PE for less than 30 seconds, and the power was cut off. I tried it several times and it was the same. I wonder if the BIOS version is too old. I went to official website to download the latest online BIOS update. After the update, PE directly reported the error BIOS_ACPI_ERROR in blue screen, but the problem of power failure was still unsolved!

It seems that there is something wrong with the motherboard itself. Take a look at it!

Machine appearance drawing

惠普TPN-C125不定时自动关机维修

Fuselage model: TPN-C125

惠普TPN-C125不定时自动关机维修

Main board version number: A-C701P REV:1.0

惠普TPN-C125不定时自动关机维修

After electrifying, the major power supplies were measured, and there was no abnormality. Then, touch with your hand to see where there was any temperature abnormality, and it was found that the temperature of PL14 inductor was particularly hot, which was the CPU power supply inductor. Because the baking machine takes too long, I’m not sure whether the CPU temperature is too high. After cooling the machine, I feel the temperature change of PL14 with my hands while turning it on, which is really a very fast temperature rise.

惠普TPN-C125不定时自动关机维修

Replace all the upper and lower tubes, filter capacitors and inductors of this power supply.

惠普TPN-C125不定时自动关机维修

Start the test again, the temperature of PL14 is normal, stand by for several hours, and there is no automatic power failure, so the maintenance is over!

Lenovo R7000 flower screen repair

Lenovo R7000 flower screen repair

Lenovo R7000 Blurred screen, modify the firmware (BIOS program) to enable the computer to start automatically when the boot.

Machine model: Lenovo R7000

Fault phenomenon: screen Blurred screen

Maintenance process: the Lenovo r7000 Blurred screen, which was sent for repair by peers, is very serious. It costs money when it is started, but it can enter the system. The colleague introduces that the customer is an office workernotebookComputer, peers themselves said that the graphics card may be broken, need to Repeat welding graphics card or replace the graphics card to solve.
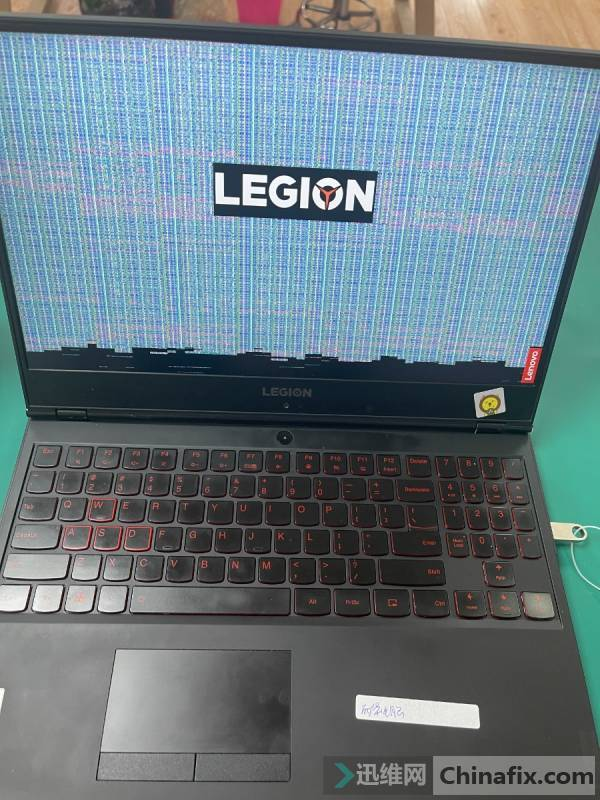
Lenovo R7000 flower screen repair


Lenovo R7000 flower screen repair Figure 1.

Boot screen
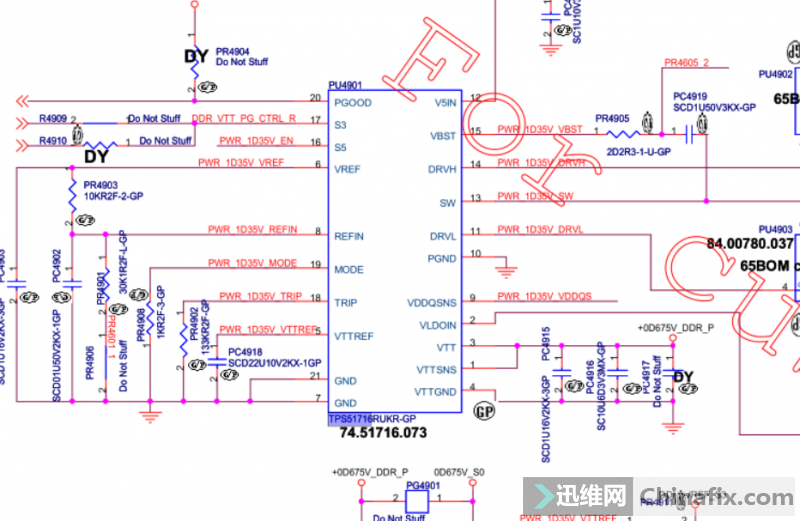
Lenovo R7000 flower screen repair


Lenovo R7000 flower screen repair Figure 2.

Blurred screen is really serious for the interface of preparing to boot. I believe many maintenance engineers have encountered this kind of Blurred screen. The maintenance method must be to start with a simple method first and exclude the memory first. The Blurred screen caused by a (Dell Computer) memory two days ago is not much different from this.After clearing the memory, the fault still remains.Lock fault in the motherboard, remove the machine, take out the motherboard to see the CPU and graphics card.
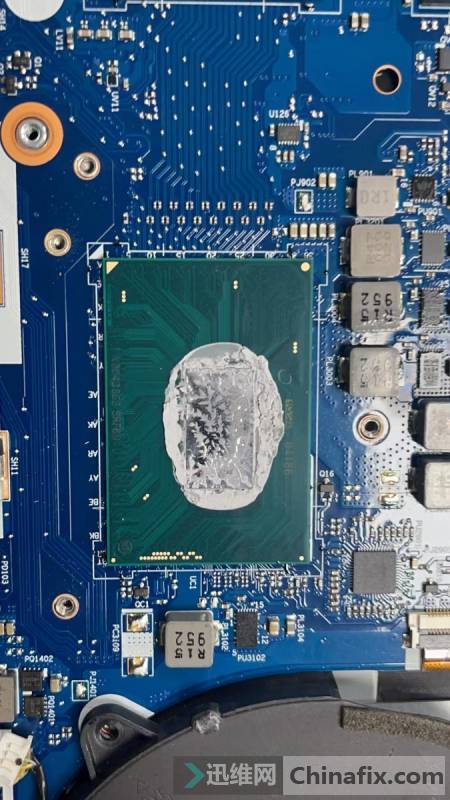
Lenovo R7000 flower screen repair

Lenovo R7000 flower screen repair Figure 3.
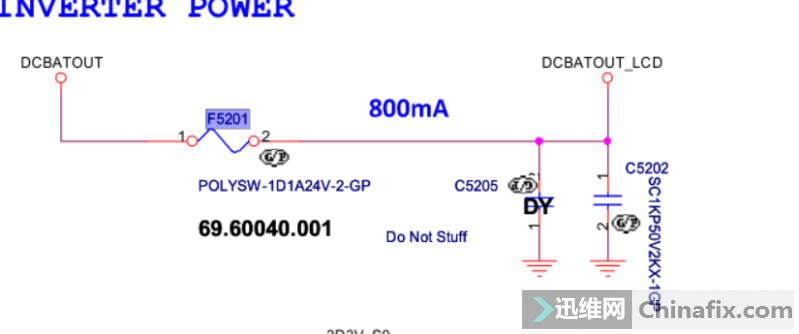


Lenovo R7000 flower screen repair Figure 4.
Some years ago, the master who repaired notebook computers liked to use one of the moves is to heat SMD REWORK STATION Repeat welding first to see whether the display is normal. If the display is normal, it means that the display card Inveracious Soldering, and then go to Repeat welding on the BGA Rework Station welding plaorm. We can also try to heat SMD REWORK STATION Repeat welding, or Blurred screen, with BGA Rework Station Repeat welding still Blurred screen, and feel Blurred screen is more serious,It means the video card is broken.

This video card chip is more expensive to buy, to be honest, to help peers replace the graphics card, if there is no professional test equipment to test the graphics card chip, it is very easy to get hit.Finally, let the peer communicate with the customer, whether the office computer is OK or not, and the customer agrees that as long as it is repaired, it can work normally, and other things don’t matter.This machine has its own unique display, but because the display Blurred screen cannot be adjusted, he finally communicated with his maintenance friend, and he thought of a move. By modifying the firmware (BIOS program) to make the computer automatically use the display when it starts up, it can solve the problem of Blurred screen.

According to this maintenance plan, the BIOS was quickly flashed. After the test,no booting might not be installed because of the urgent test. I thought that there was something wrong with the BIOS program, and then the BIOS of the original machine was still no booting. After taking out the mainboard, carefully checking it, carefully installing it back, starting Blurred screen again, and then brushing the modified firmware, the display was normal.

Lenovo R7000 flower screen repair Figure 5.
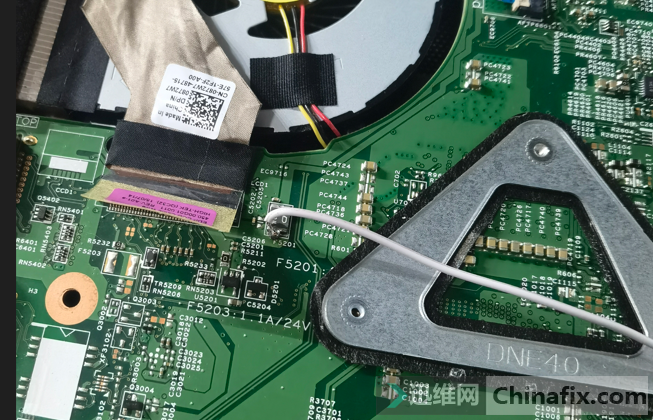
Lenovo R7000 flower screen repair Figure 6.
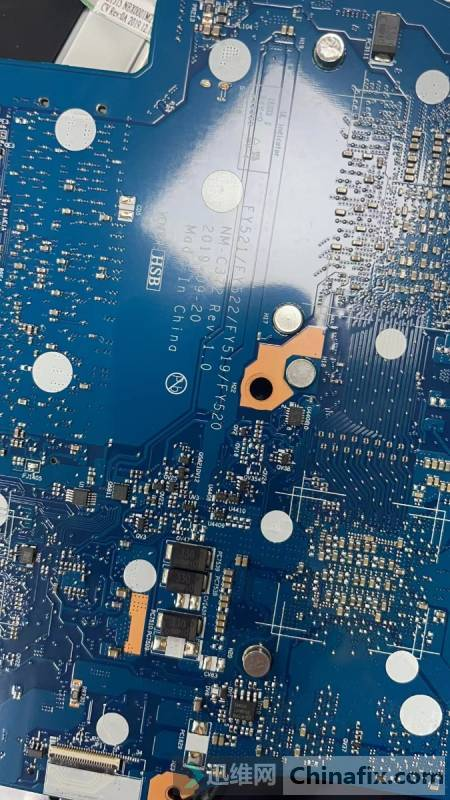
Lenovo R7000 flower screen repair Figure 7.

Asus H110M-K mainboard Won’t Turn On repair

Asus H110M-K mainboard Won’t Turn On repair


Main board model: ASUS H110M-K main board

Symptoms: motherboard Won’t Turn On

Maintenance process

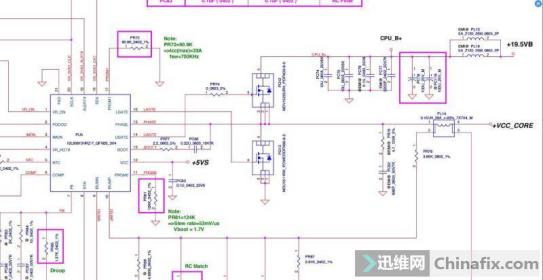
ASUS H110M-K motherboard, the fault is that it can’t be turned on. Measure VCC signal according to time sequence:

P_+VCCIO_EN_10 2V is normal;

VCCSA 0.96V is normal;

P_VCORE_EN_10 3.3V is normal;

P_VR_READY_10 is not normal without VCC;

Look up P_VRM_PGD_10.VCC is not normal.

Asus H110M-K mainboard Won't Turn On repair


Asus H110M-K motherboard Won’t Turn On repair figure 1.

P_VRM_PGD_10 does not have VCC. This signal is a PG signal sent by CPU power management chip ASP1401B, which shows that there is something wrong with CPU VCC. According to the time sequence, CPU power management chip will send PG when it receives EN and VCC. Let’s find out the conditions for generating VRMPWRGD.

1. VCC VCC 5V of 1.CPU power management chip is normal;

2.P_VCORE_EN_10 3.3V is normal;

3. Measure the VCC VCC of the driver chip of each phase VCC of CPU, and all of them are 12V normal;

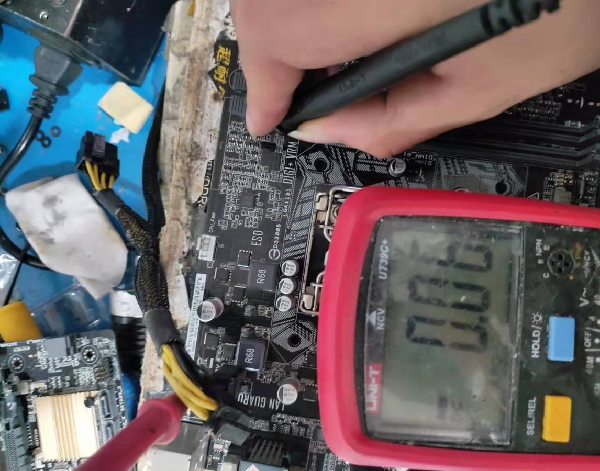
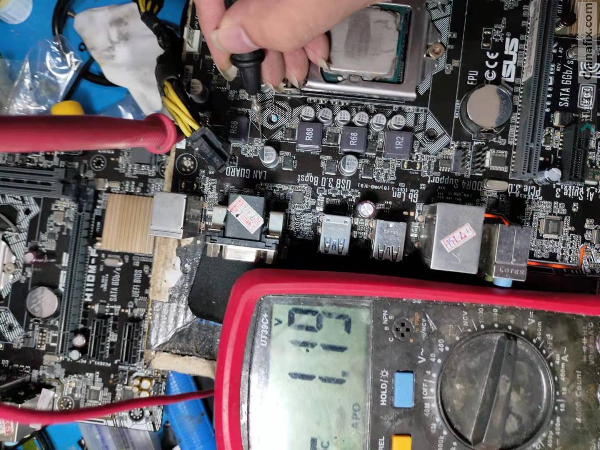
4. P_VCORE_DRON_10 This is the signal used to turn on the driver chip. The measured value is 1.19V, which is obviously abnormal, and the normal value is 5 V.

Asus H110M-K mainboard Won't Turn On repair


Asus H110M-K motherboard Won’t Turn On repair figure 2.

P_VCORE_DRON_10 is a signal sent by the power management chip to the driver chip, and it will go through a 49.9-ohm resistor to four driver chips. Therefore, if the VCC is low, it is necessary to turn off the 49.9-ohm resistor between the driver chip and the power management chip one by one to see which resistor will restore VCC. If all the resistors are turned off, it may be that the power management chip is broken.Find out the fault point after a wave of analysis operation.

Asus H110M-K mainboard Won't Turn On repair


Asus H110M-K motherboard Won’t Turn On repair figure 3.

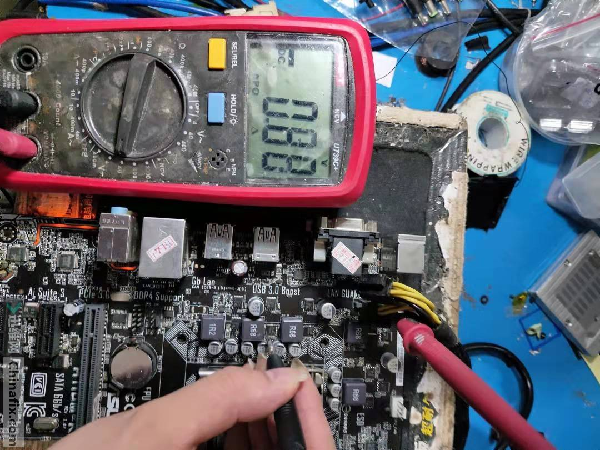
Measure P_VCORE_DRON_10 VCC again after disconnecting this resistor.

693;IMG_259


Asus H110M-K motherboard Won’t Turn On repair figure 4.

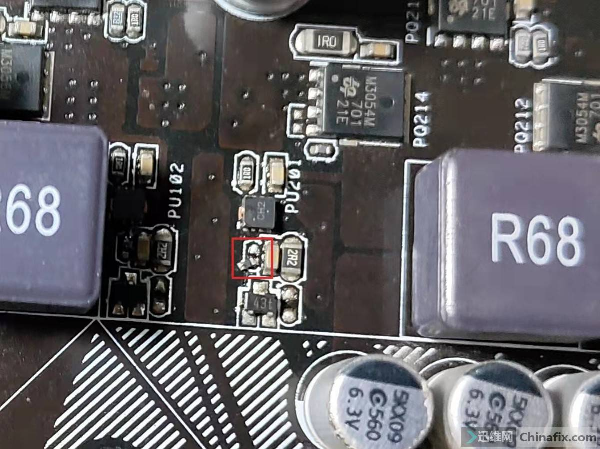
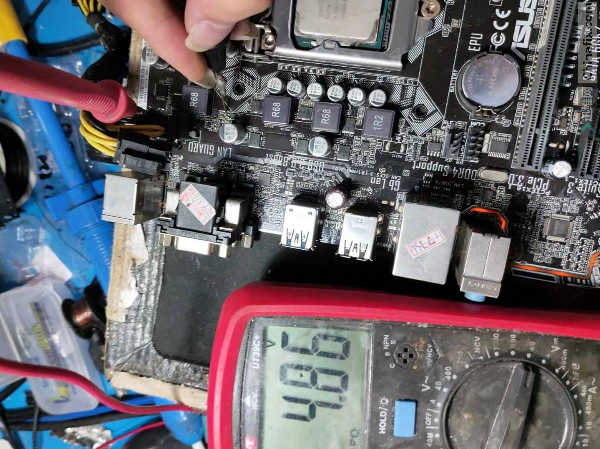
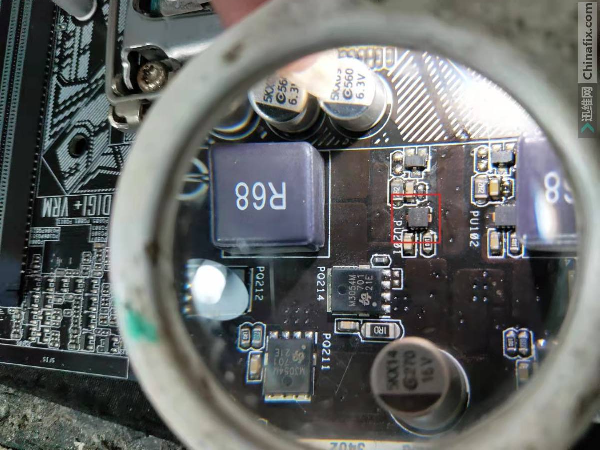
P_VCORE_DRON_10 VCC is back to 4.86V normal, which means that the driver chip of integrated display VCC is damaged, which leads to the lowering of P_VCORE_DRON_10 VCC. Replace the damaged driver chip NCP81166A(PU201).

791;IMG_260


Asus H110M-K motherboard Won’t Turn On repair figure 5.

After the replacement of the measuring CPU VCC, it was not surprising that it had already happened.

816;IMG_261


Asus H110M-K motherboard Won’t Turn On repair figure 6.

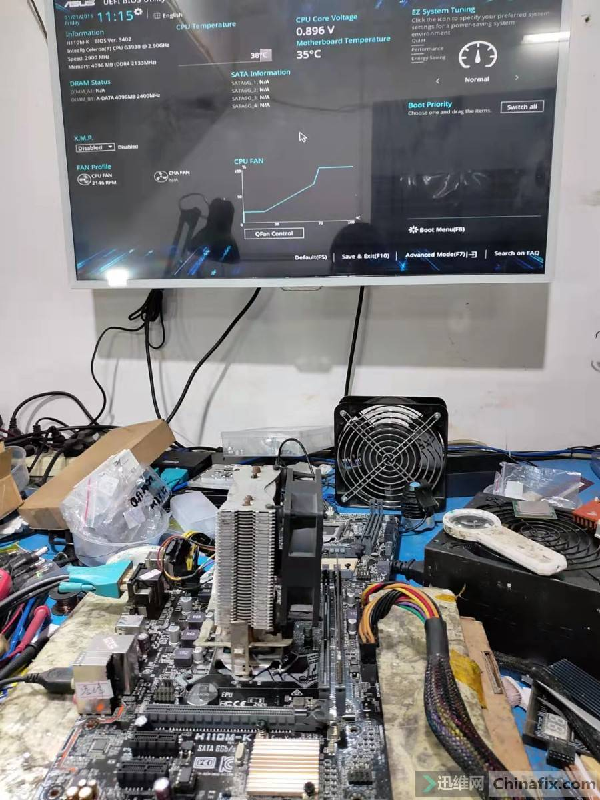
Plug-in, start-up, easy lighting, troubleshooting and maintenance are over.

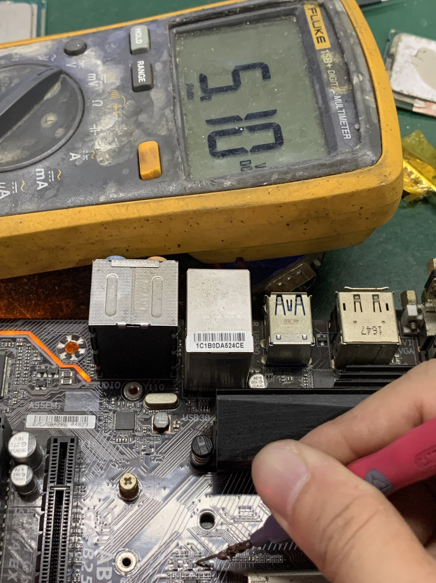
844;IMG_262

Asus H110M-K motherboard Won’t Turn On repair figure 7.
ECS B75H2-M3 no reset auto power off restart repair

Lenovo CIH81M does not trigger.


The customer brought a Lenovo brand machine and said it was not turned on.

Get the hand power, do not trigger, measure the power supply, USB to the ground.

联想CIH81M不触发


Seeing that the motherboard BIOS has been moved, I thought it was a small problem, but it was useless to discharge and brush the BIOS. There’s no way out. Remove the power supply from the side.

There are 12v, 3.3 and 5v, and that’s the problem.

联想CIH81M不触发


There was no en in the test, but there was 3.3, and there should be 5 V. He just couldn’t find it. He read another big boss’s post.

The triangle tube on the left side of PC920 is controlled by en. If it is removed, it still won’t work. I planned to change the power supply IC, went to Taobao and asked Mr. Su, and the result was 25, which scared me to decide to remove it on the spot.

How about measuring the resistance of each foot? The resistance of G turns out to be 45, which is the same as that of S, so I understand. G passes S, after replacement. Exquisite, when I entered the system, I found that six USB could not be used.

联想CIH81M不触发


Measure the safety tube 5 pin tube. One end is 5v and the other end is not, u54 u51

Take it down and connect it with tin wire. Don’t ask why you don’t replace it. Next time you burn it, it won’t be a big piece, just like the safety resistor O ohm.

联想CIH81M不触发


Re-enter the system and solve it perfectly.

Therefore, be sure to ask about the customer’s use, phenomenon and recent operation, or you will take a lot of detours.

Also, don’t believe everything the customer says, burn USB at 12 V.

Gigabyte ga-b250m-d3h motherboard does not display when powered on

Gigabyte ga-b250m-d3h motherboard does not display when powered on

Motherboard model: Gigabyte ga-b250m-d3h motherboard
Fault phenomenon: the main board does not display when it is turned on
Maintenance process:

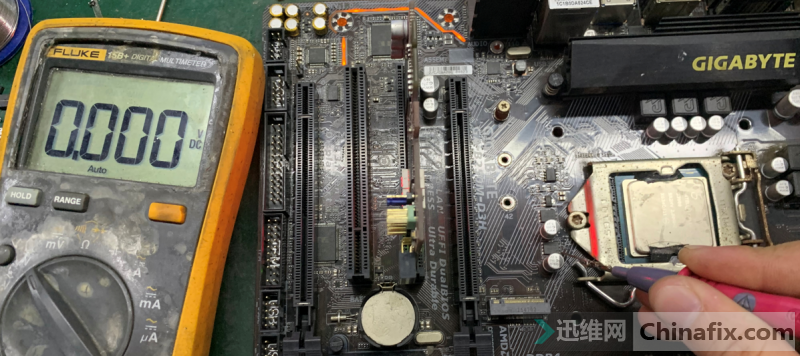
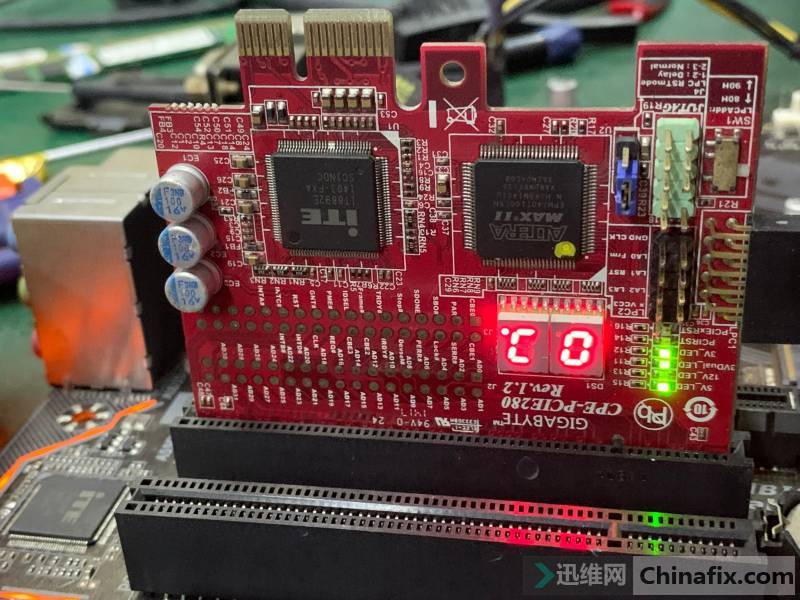
A gigabyte ga-b250m-d3h motherboard, the fault is that the motherboard does not display when it is turned on.No Short circuit at 12V,switch after direct power on.
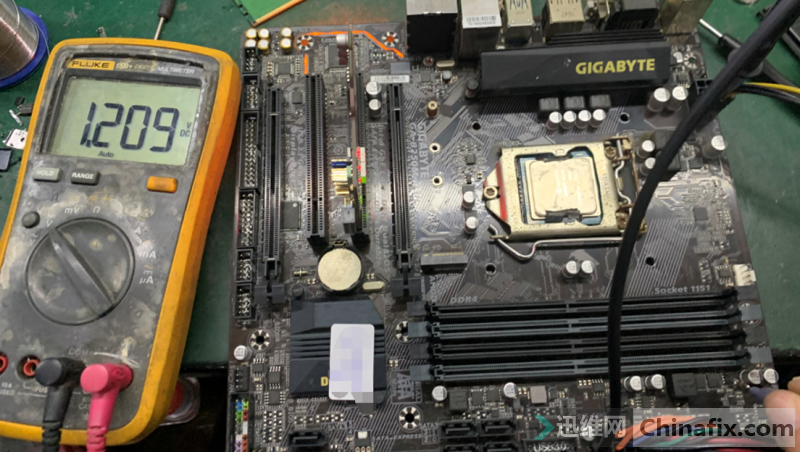
The memory of 1.2V VCC is normal.

Gigabyte ga-b250m-d3h motherboard does not display when powered on


Gigabyte ga-b250m-d3h motherboard does not display figure 1.

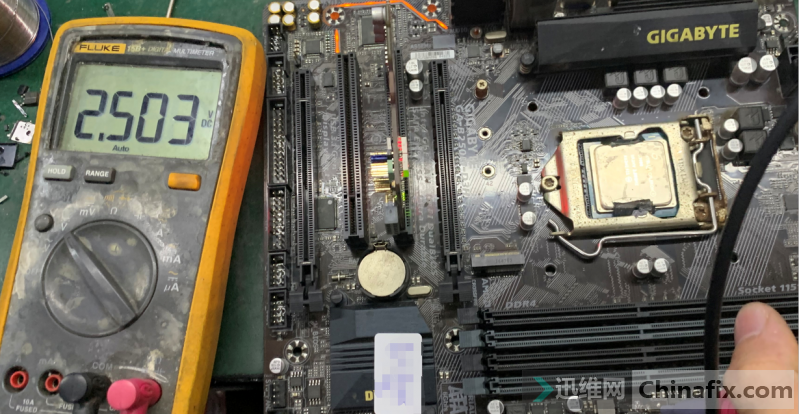
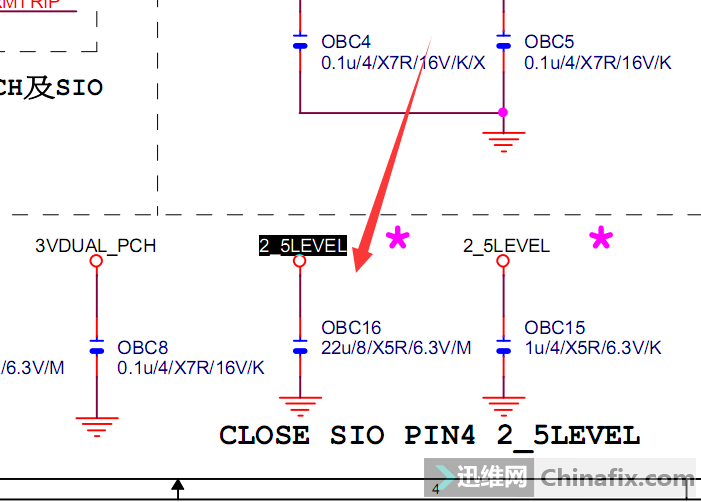
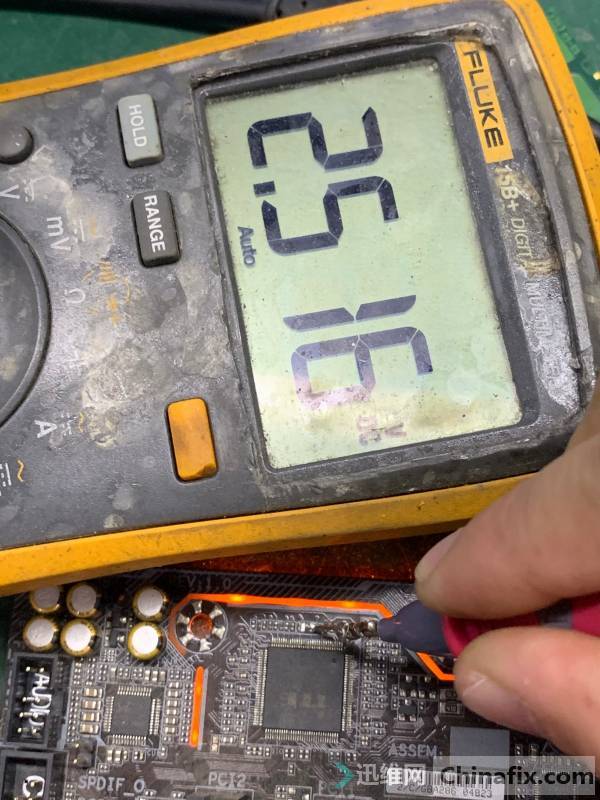
The memory of 2.5V VCC is normal.

Gigabyte ga-b250m-d3h motherboard does not display when powered on


Gigabyte ga-b250m-d3h motherboard does not display figure 2.

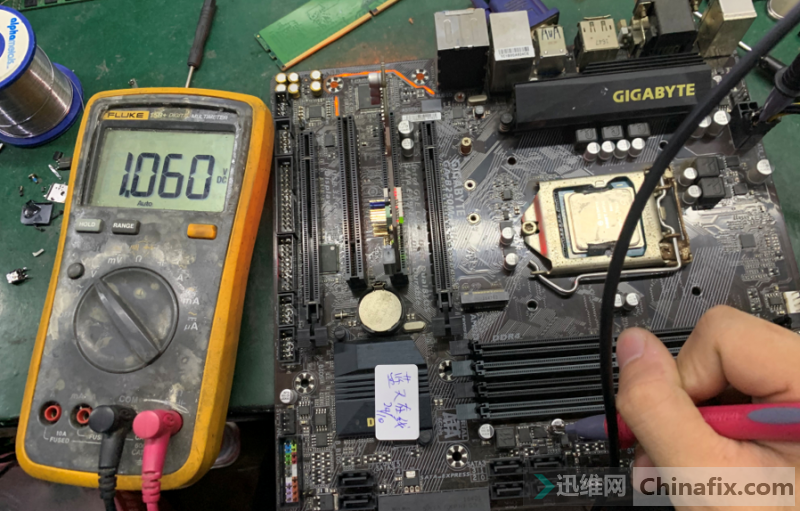
The bridge VCC 1.0V was normal.

Gigabyte ga-b250m-d3h motherboard does not display when powered on

Gigabyte ga-b250m-d3h motherboard does not display figure 3.
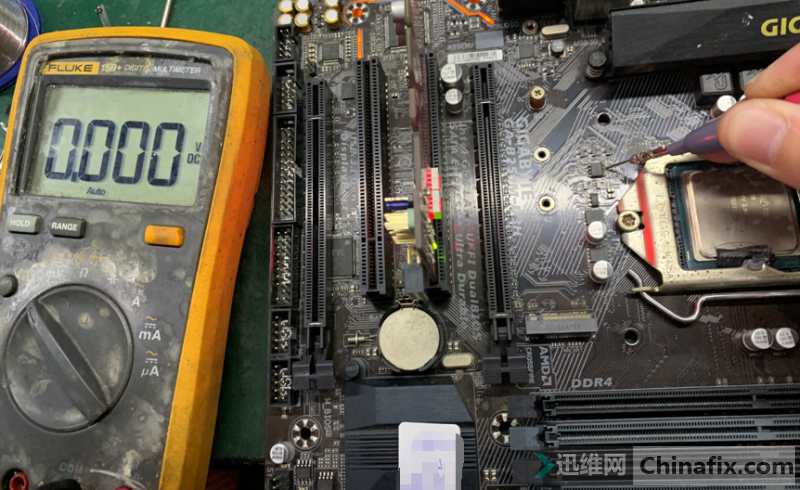
Vccsa VCC was abnormal.

246;IMG_259


Gigabyte ga-b250m-d3h motherboard does not display figure 4.

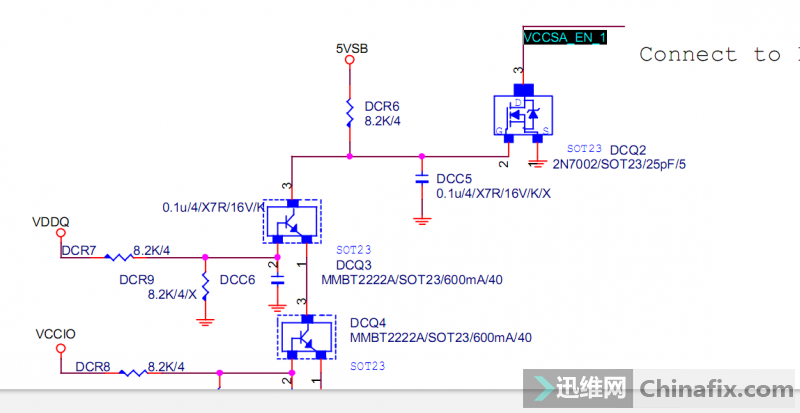
Look at the drawing for 358 control, 358 of the third pin for low level.

273;IMG_260

Gigabyte ga-b250m-d3h motherboard does not display figure 5.
Trace the en signal from dqc2 field pipe.

293;IMG_261

Gigabyte ga-b250m-d3h motherboard does not display figure 6.
Dqc3 field transistor B pole 1.2V is normal.

314;IMG_262


Gigabyte ga-b250m-d3h motherboard does not display figure 7.
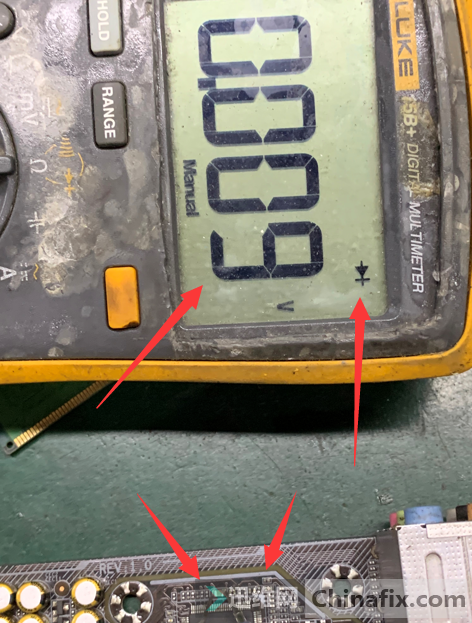
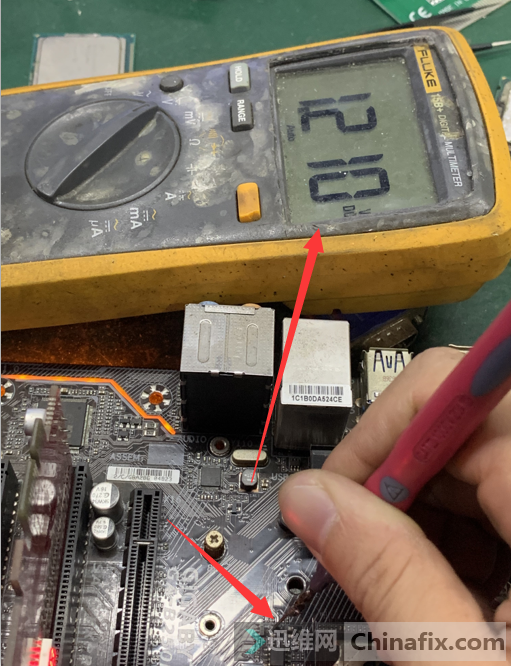
Measure dqc3 field tube C pole 5V, abnormal.
335;IMG_263


Gigabyte ga-b250m-d3h motherboard does not display figure 8.

The dqc2 field tube was directly removed, but there was still no VCC. It was found that the 2.5level VCC was not generated by measuring the partial voltage resistance.Trace from Io chip,diode value is 0,Capacitor,Short circuit.

401;IMG_264

Gigabyte ga-b250m-d3h motherboard does not display figure 9.

402;IMG_265

Gigabyte ga-b250m-d3h motherboard does not display figure 10.

403;IMG_266

Gigabyte ga-b250m-d3h motherboard does not display figure 11.
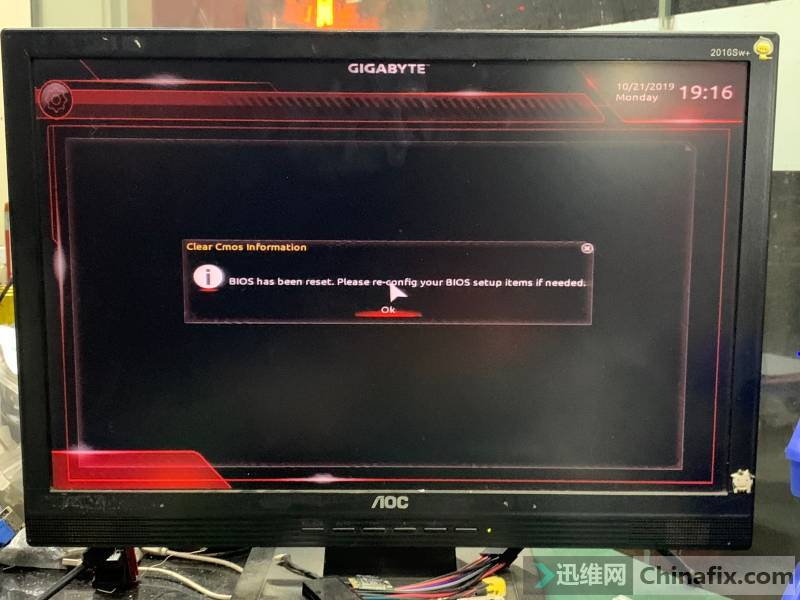
After removing Capacitor, the mainboard was repaired.

417;IMG_267

Gigabyte ga-b250m-d3h motherboard does not display figure 12.

418;IMG_268

Gigabyte ga-b250m-d3h motherboard does not display figure 13.

Gigabyte GTX970 graphics card runs 3DMRAK screen is black or frozen repair


Gigabyte GTX970 graphics card runs 3DMRAK screen is black or frozen repair

Graphics card model: Gigabyte GTX970 graphics card

Fault symptom: the graphics card runs 3DMRAK screen is black or frozen

Maintenance process:

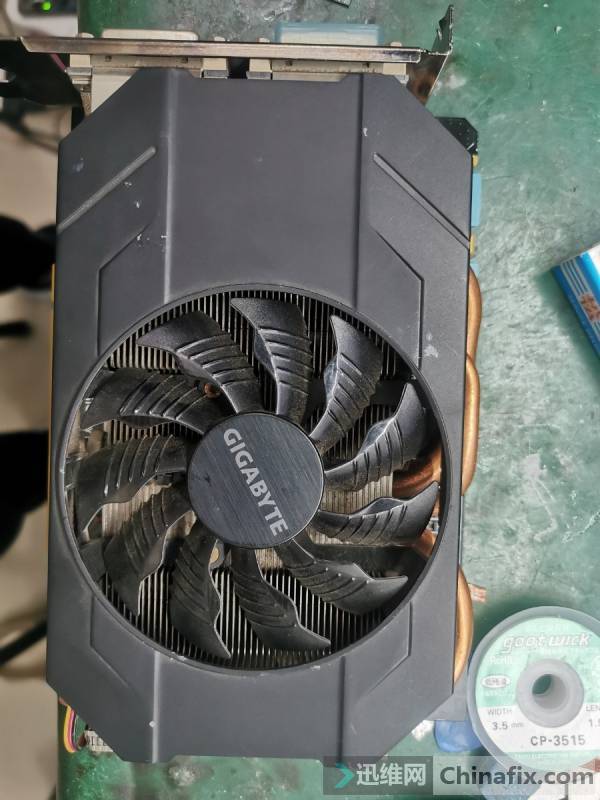
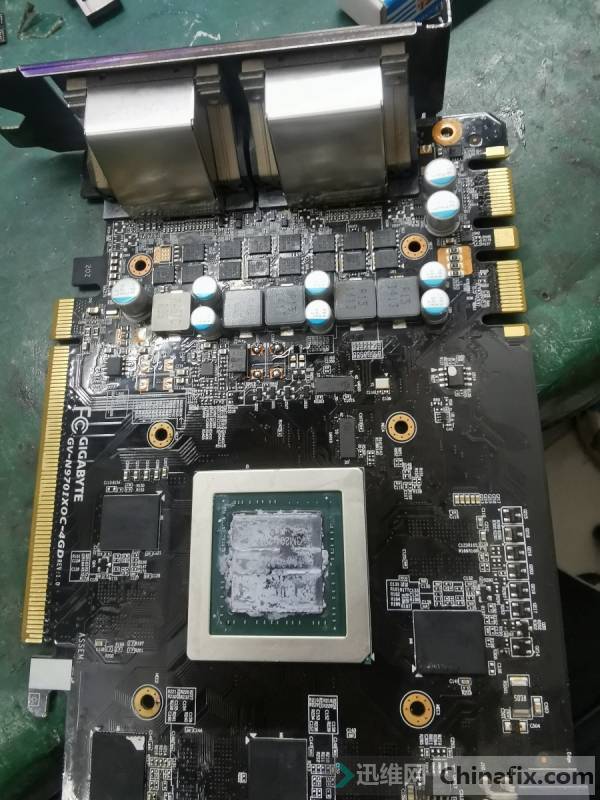
A piece of Gigabyte GTX970 graphics card, the computer tests screen is black or frozen as soon as Master Lu runs, sometimes the screen is blank, MATS is tested, naturally there is no problem, then running MOD is also a PASS, and memory overclocking runs the same PASS.

Gigabyte GTX970 graphics card runs 3DMRAK screen is black or frozen repair


Gigabyte GTX970 graphics card runs 3DMRAK screen is black or frozen maintenance figure 1.
I thought that the core Inveracious Soldering was gone. I got on Repeat welding, and found that I could follow Master Lu. Half of the trouble of running 3DMRAK appeared again. I judged that VCC had a problem.

Gigabyte GTX970 graphics card runs 3DMRAK screen is black or frozen repair


Gigabyte GTX970 graphics card runs 3DMRAK screen is black or frozen maintenance figure 2.

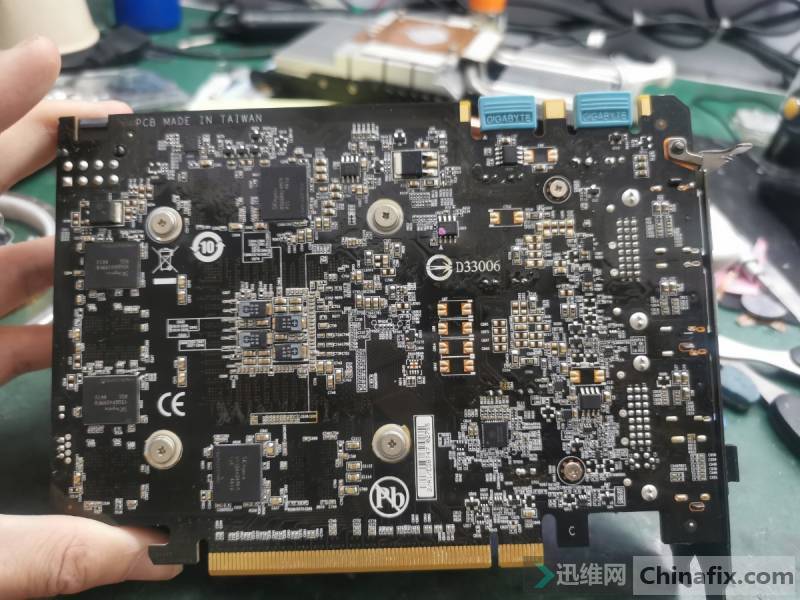
Oscilloscope measures that several Inductor and PWM wave turns on normally. According to past maintenance experience, this kind of fault can also occur due to poor filtering. I found six desktop Capacitor on the back soldering, which can finish the 3DMARK. I wanted to replace six small Capacitor. After testing, I found that there were several patches Capacitor next to the core Capacitor Inductor that were not loaded. I directly installed three 330 small Capacitor, and all the tests were normal.

Gigabyte GTX970 graphics card runs 3DMRAK screen is black or frozen repair

Gigabyte GTX970 graphics card runs 3DMRAK screen is black or frozen maintenance figure 3.

Gigabyte H110M-S2 has no CPU power supply.

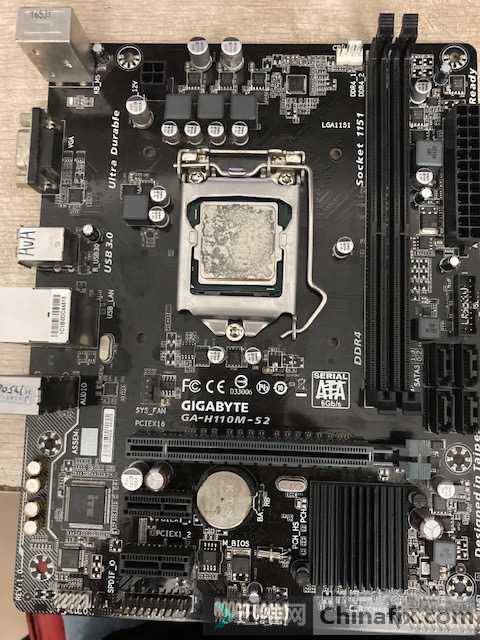
Motherboard model: Gigabyte H110M-S2 REV:1.0, failure phenomenon is not displayed when starting. There is no CPU power supply for measurement, and all other power supplies are normal.

技嘉H110M-S2无CPU供电

技嘉H110M-S2无CPU供电

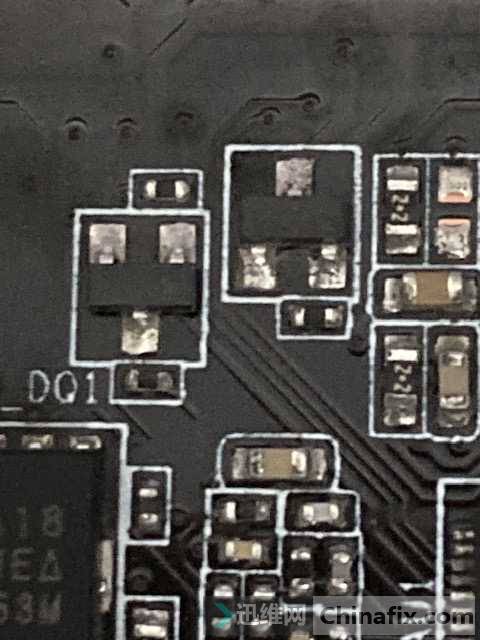
The power supply chip is ISL95858. It is normal to measure VR_ENABLE as 3V. Measuring VDDP is 12V normal, and measuring VDDP is 3V, which seems normal, but it is not normal, which should be 5V. 5VDUAL is converted by DAQ5. It is abnormal to measure that the control pin of DAQ5 is 4.5V, and the control pin is 12V through 8.2K resistor. Normal thinking must feel that the resistance has deteriorated and become larger, but the measured resistance is normal. Troubleshooting of replacing DAQ5.

技嘉H110M-S2无CPU供电

Microsoft Activation Scripts (MAS)


Method 1 - PowerShell (Recommended)

​Right-click on the Windows start menu and select PowerShell or Terminal (Not CMD).
Copy and paste the code below and press enter
irm https://get.activated.win | iex
You will see the activation options. Follow the on-screen instructions.
That's all.


Method 2 - Traditional

Download the file under the code button from GitHub or Bitbucket
Right-click on the downloaded zip file and extract
In the extracted folder, find the folder named All-In-One-Version
Run the file named MAS_AIO-CRC32_XXXXXXXX.cmd
You will see the activation options, follow the on-screen instructions.
That's all.