How to fix the ‘Network Error – Windows Cannot Access \\ Shared Drive’ Error?
“Windows Cannot Access \\ Computer Name” is mainly a network related problem of your Local Area Connection and generally this error occurs due to the lack of network permissions, improper installed Network Drivers, and sometimes a single corrupted windows registry can be the reason too.
Most of the times people have this problem right after creating a new LAN Connection in their network and mainly the error popup message appears when every time you try to open the shared folder located on the other computer.
The bad thing which I really hate about this network error is, not only on the folder you can also get this error message on any network file or even on the network shared drive too. And believe it or not but sometimes it gets really hard to find where the actual fault is, and what do we really need to do to fix the problem.
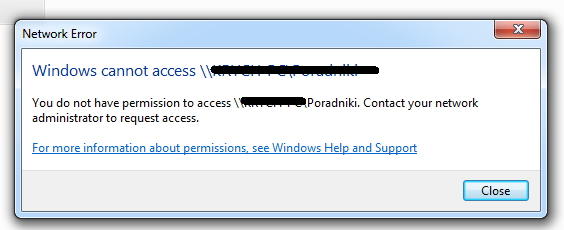
Network error
Windows cannot access \\ Computer Name
You do not have permission to access \\ Computer Name contact your network administrator to request access.
If you’re having this problem on your Local Area Network, then I don’t think you should really need to worry about it;
Because with the help of this tutorial I’ll definitely going to help you out by showing you, how you can change the permissions configuration of your computer to read and write the files or folder on the shared network drive through your Windows Network Place.
This problem can occur on any version of windows, even if you are using the latest Windows 10 or running an old Windows 7 Computer. Normally, Access Denied Network Error comes because of some kind of network related permission problem. But sometimes there are some other reasons for this error to shows up on your computer’s screen and here’s the list of those reasons which can be possibly happening on your computer:
Improper LAN Connection
Improper LAN Sharing Setting
Improper Drive or Folder Security Setting
TCP/IP NetBIOS Setting is Unconfigured
Windows Registry got Corrupted
Network Driver got Corrupted
Improper LAN Connection and Sharing Setting
If you have recently created a LAN connection by yourself, or maybe tried to start the file sharing, or changed the LAN Wire or Modem, or just made any changes in your LAN configuration, then this is the time where you’ll need to rectify it all.
Let’s start with the connections and wires;
To make a connection between two different network devices like a Modem and Computer, we actually need to use a Straight cable. On the other hand, the same network devices like ‘PC to PC’ or ‘Modem to Modem’ need a Cross-over cable to interact properly.

The reason behind explaining that is because if you have recently changed any cable in your network then make sure the cable you used is suitable for the proper connection.
Both of the cables look exactly the same but the internal wiring is completely different and that’s why people usually get confused while creating their PC to PC LAN connection.
The next configuration is the ‘Sharing Setting’. Check for the proper IP configuration on every connected device in your network. If all the PC’s have an IP address configured in it, then make sure it won’t conflict. Confliction mainly happens when two different PC has the same IP configuration.
You’ll also need to assign the IP address to all of your Share PCs if you found the setting is pre-set on “Obtain the IP Address Automatically”.
To change or check your saved setting, you can go to the ‘Network and Sharing Center‘ and then on the left sidebar, click on “Change Adapter Settings” option. Now right-click on your network adapter and select “Properties“. After that, select “Internet Protocol Version 4 (TCP/IPv4)” and then click on its “Properties” button.

Then on the ‘Advanced sharing setting’, make sure everything is configured as listed below:
Turn on network discovery.
Turn on file and printer sharing.
Allow windows to manage homegroup connection (recommended).
Turn on sharing so anyone with network access can read and write files in the public folders.
Use 128-bit encryption to help protect files sharing connections (recommended).
Turn off password protected sharing.
Note: Make these changes on your current selected network profile.

You’ll also need to check that all your shared PC is working on the same network Workgroup. To check or change the workgroup, you can go your ‘Computer properties’and click on the “Change setting” button under the “Computer name, domain, and workgroup settings”, and then click on “Change…”.

After that click on the “Network ID” on the same pop-up window and then follow the instruction given in the picture below:

Improper Drive or Folder Security Setting
80% of you will be going to fix your problem by following this particular solution because generally, people do forget to change the security setting while making any drive/file/folder shared in their network place.
So now I’m going to show you how you can easily configure the permission setting to connect with all devices in your network just to read and write the files or folder.
If you’re having this problem with all of your network drives and folder and wanted to grant permission to all of those shared folders or drives at once, then it’s not possible and you’ll need to repeat all these steps for all of your shared drives and even for a single file and folder.
If the list of sharable File/folder contains in a single drive, then granting permission for that single drive can make all the internal File/Folder read and writeable for the other network computer.
Give Sharing Permission to Everyone
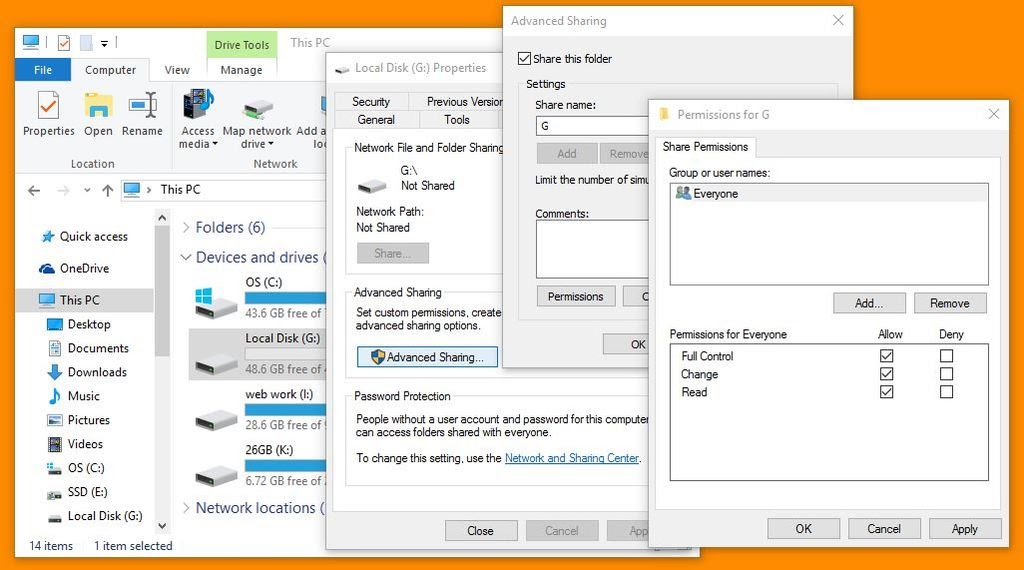
To configure the sharing permission, First, you’ll need to right click on that drive, file or folder which you wanted to share and then select ‘Properties’.
In the properties window, select the “Sharing” tab and then click on “Advanced Sharing …” button. Now make sure you have ticked on the “Share this folder” button.
After that, click on the “Permission” button and give “Everyone” user the Full Control.
Add “Everyone” Username in Security Tab.
This step allows you to add a new username into the security tab of your file/folder/drive’s properties, just to make it accessible to all users which is connected to your LAN.
To grant the access to everyone, we actually need a username called “Everyone” under the security tab, so your OS can permit other connted PC’s to cross the security. But still, there is no username called ‘Everyone’ is mentioned under the security tab of your shared drive, file or folder.
So now again in the properties windows, click on the Security Tab and then select the “Edit” button which will lead you to another pop-up window, where you can add the username by clicking on another “Add…” button.

Now in the third pop-up window, you’ll have to click on the “Advanced …” button which will help to find all of the linked usernames connected to your PC.
On the fourth pop-up, click on the “Find Now” button to make your computer to show you the list of all available users;
And in between all those usernames, you’ll find the username called “Everyone” in the list, which you need to select and then click on “OK”.

After that, you’ll again need to click on the “Ok” and at this moment you will be seeing the username “Everyone” is showing under the users and groups setting.

Allowing Permission to “Everyone”.
When you have done with adding the username, then it’s the time when you need to grant the full permission to the username “Everyone” in the security tab, just to make it accessible from any LAN connected computer.
Now, click on the username “Everyone” and then tick on the Full control option and then click on “Apply”.

After that, you will able to see the “Windows Security” pop-up on the screen, which will apply the setting for all of your files containing in that shared drive or folder.
So, at this moment you’ll just need to sit back and watch the whole process until it gets completed and make sure you don’t click on the cancel button or otherwise you’ll get the same problem while accessing some files in the future.
After that, you can actually able to read and write the files on that drive right after when this whole security configuration gets done. If not, then just continue.
Configure TCP/IP NetBIOS
‘TCP/IP NetBIOS’ also known by its another name “NetBT” and it’s a network protocol based on session layer of the OSI model, allowing applications on separate computers to communicate over a local area network.
Using the NetBIOS over TCP/IP (NetBT) service on the network allows users to share files, printers, and log on to the network. If the NetBT service is unconfigured, some of these functions might not be available to the user. If this service is disabled, any services that explicitly depend on it will fail to start.
So, make sure on every shared computer of your network the ‘NetBIOS over TCP/IP’ is enabled and to confirm that, here is the procedure given below:

To change the configuration, first, you’ll need to search the “services.msc” on the Windows Starts Menu to open the ‘Windows Servies’ (where you can easily start, stops, and configures any Windows services).
Now on the Services window, search for a service named “TCP/IP NetBIOS Helper”and double-click on it. Then on the pop-up general tab, change the ”Startup type setting” to the ‘Automatic’.

After when you have done with the services configuration, then now it’s the time when you need to enable the ‘NetBIOS over TCP/IP’ setting in your computer’s Network Adaptor.
To do that, you’ll have to again open the “Internet Protocol Version 4 (TCP/IPv4)”properties. Then on the pop-up, click on the “Advanced…” button, select “WINS” tab and pick “Enable NetBIOS over TCP/IP” as your main preference. And that’s it.

Corrupted Windows Registry
The Windows Registry is a hierarchical configuration storage database that stores settings for the Microsoft Windows Operating System and other installed software in your Windows.
The registry is the main target when a virus or malware starts to corrupt your windows and a single changed value in your Windows Registry can cause this network related problem.You can fix your Windows Registry by using some best in class Registry Cleaner and that will fix your problem by just doing some simple steps.
But before using that, I have some couple of manual registry settings which you can try to fix the issue;

First, open your Windows Registry Database by using the run command “regedit”. You can press Windows + R Key to instantly show the Run Commander. Or you can just search the “regedit” on Starts Menu.
When it gets open, go to this location “HKEY_LOCAL_MACHINE\SOFTWARE\Microsoft\MSLicensing\” into the database.
Now expand the ‘MSLicensing’ folder and then delete both of the “HardwareID” and “Store” sub-folders listed under the expansion. Make sure you only delete sub-folders and not the whole MSLicensing.
This can fix the connection licensing problems in case, your connection is having any.

After that, go to the “HKEY_LOCAL_MACHINE\SOFTWARE\Microsoft\Windows\CurrentVersion\policies\system” location and then create a new DWORD Value named LocalAccountTokenFilterPolicy and then click Modify or double click on the key and type “1” under the ‘Value data’.

Corrupted Windows Drivers
Computer operating systems are able to support network adapters via software known as Network driver. Network drivers are actually what that you need in order to connect your computer to any network. If something bad happens to your network drivers then it’s quite possible that you get some constant errors on your screen while working in the network area.
